Member Management#
Purpose#
Through Member Management, you can add a user as your member. The added user will be able to access the VMs you create.
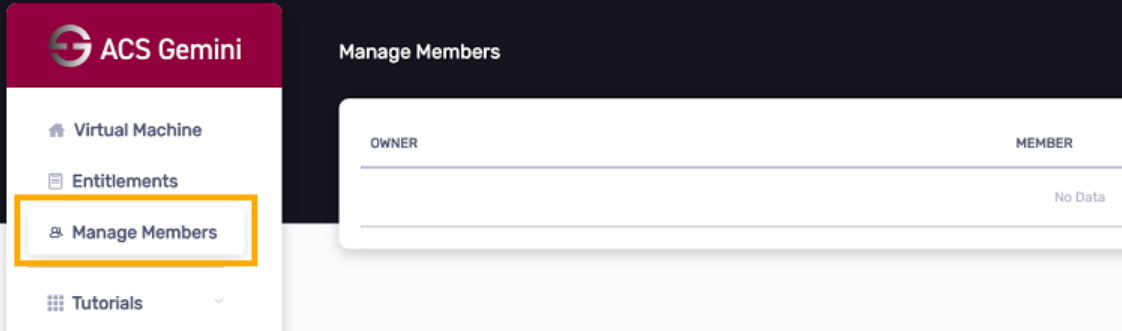
Member Management#
Click the navigation menu on the left to enter “Member Management”
Add a member to access your VMs#
Add a member in Member Management#
Click the “Add Member” button in the top right corner

Enter the user’s email in the text box
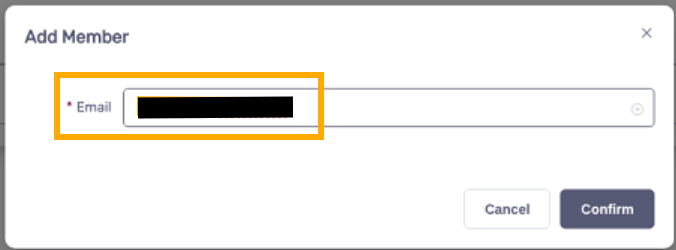
The added user will be displayed in the list

Obtain the Private Key#
SSH into the VM and then execute “cat ~/ssh_private_key”
Create a new VNC#
Click the View button:

Click the SSH:

Enter the following command to create a new VNC.
Ubuntu
vncserver --I-KNOW-THIS-IS-INSECURE -localhost no -geometry 1920x1080 -Securitytypes None
RedHat
vncserver -geometry 1920x1080 -Securitytypes None
New VNCs will be created starting from port 5902. The following example shows the creation of a VNC on port 5902.

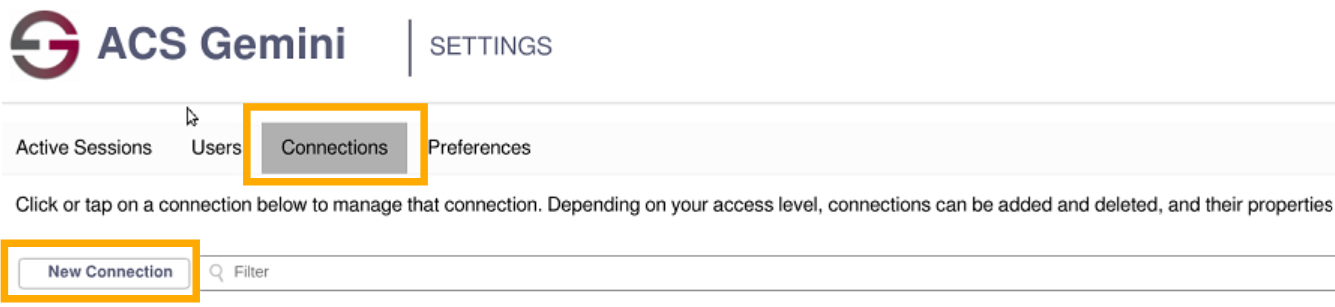
Add a new connection for the VM#
Click the View button
Click Settings
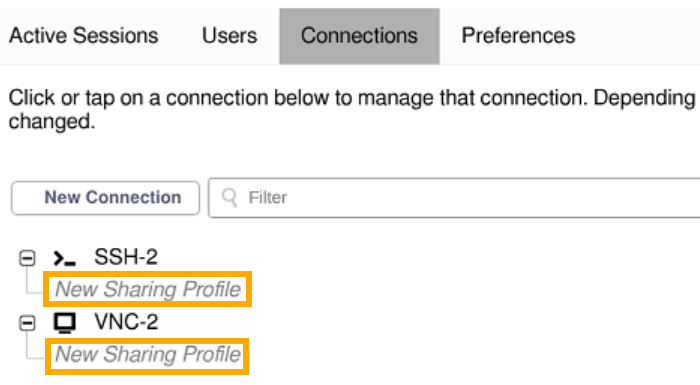
Click Connections, then click New Connection
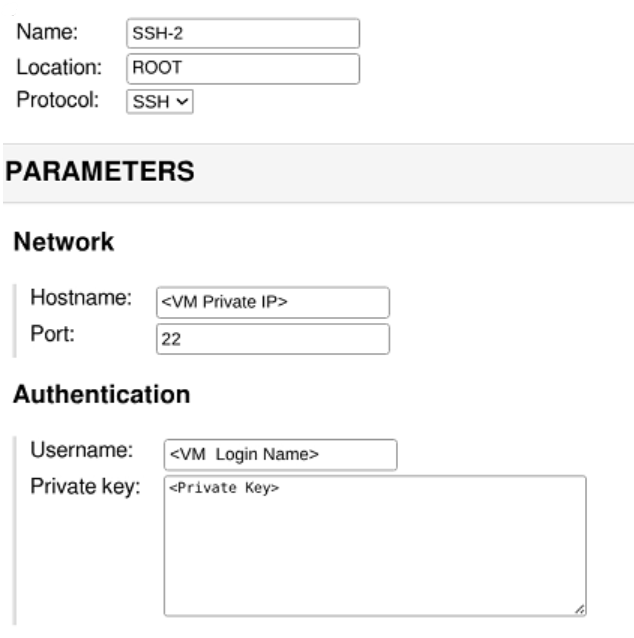
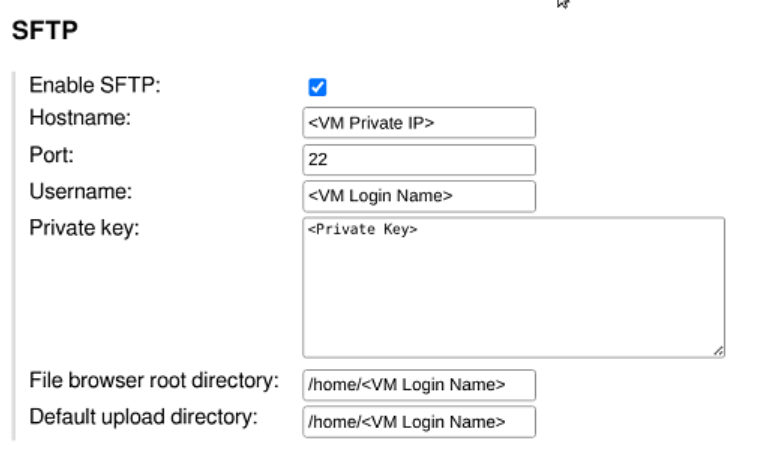
For SSH connection, please enter the following information and then click Save
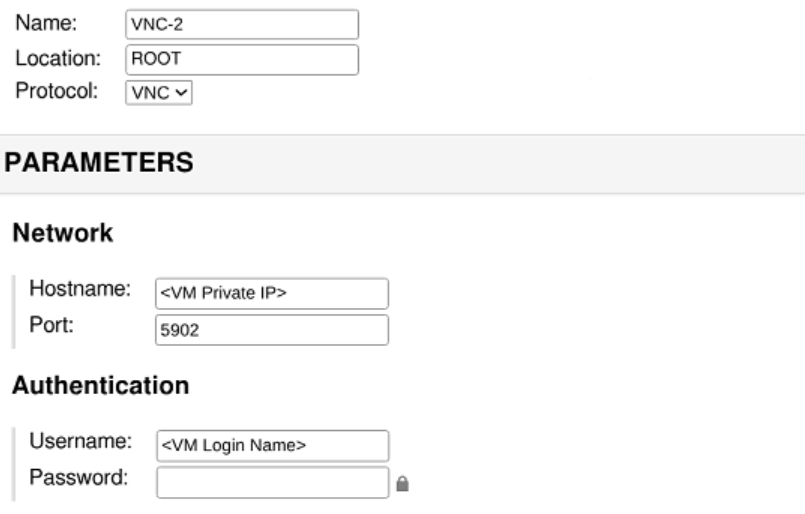
For VNC connection, please enter the following information and then click Save
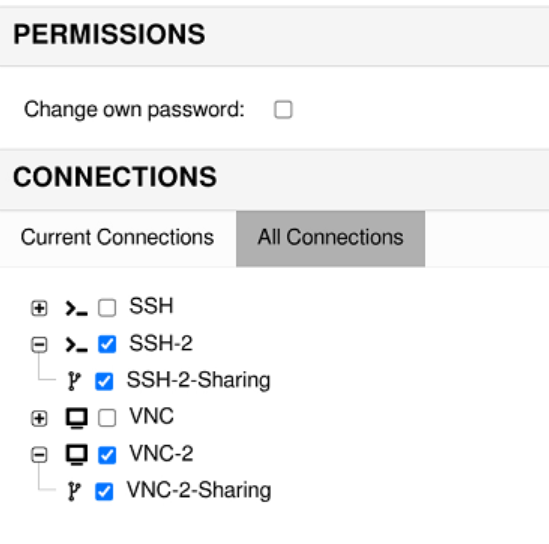
You can also configure sharing settings for newly created SSH and VNC connections, click “New Sharing Profile”, enter the Name, and then click Save.
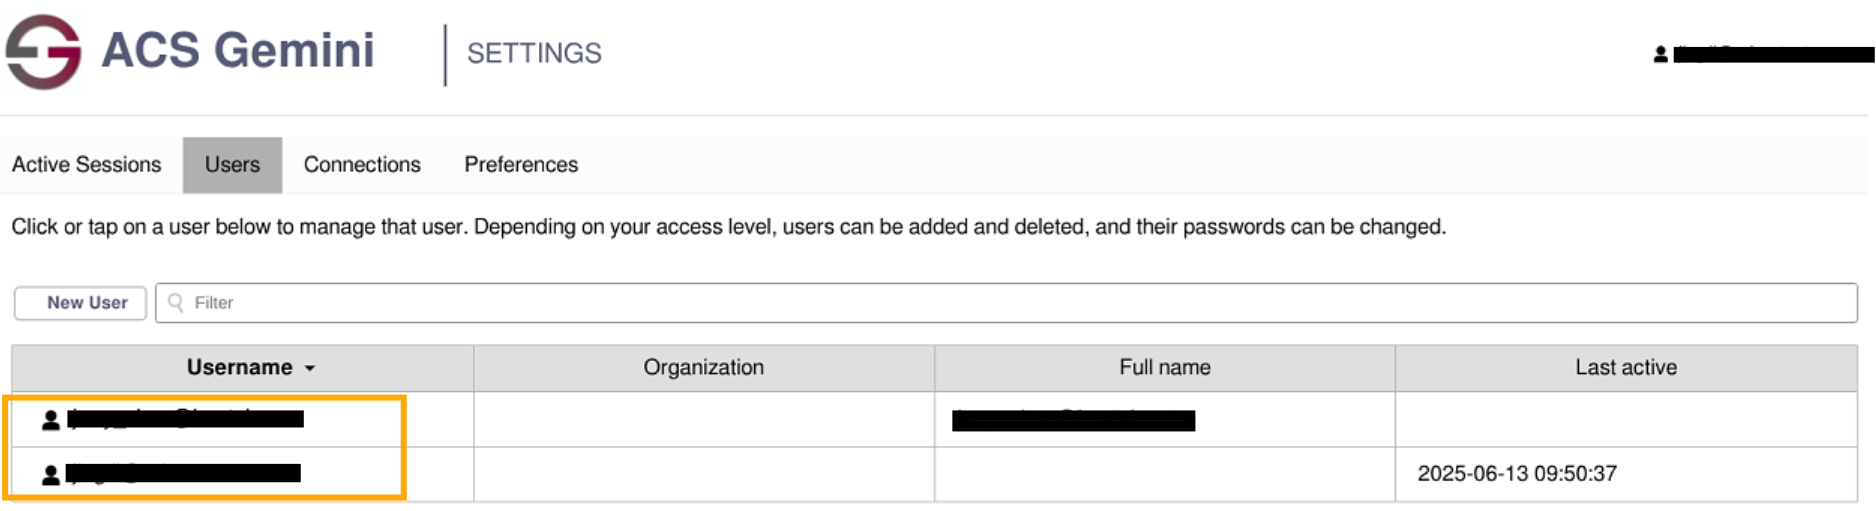
Add a new user for the VM#
Click the View button
Click Settings
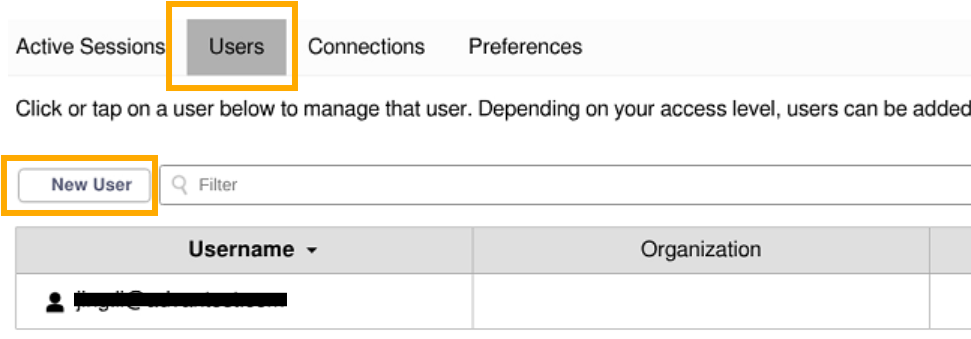
Click Users, then click New User
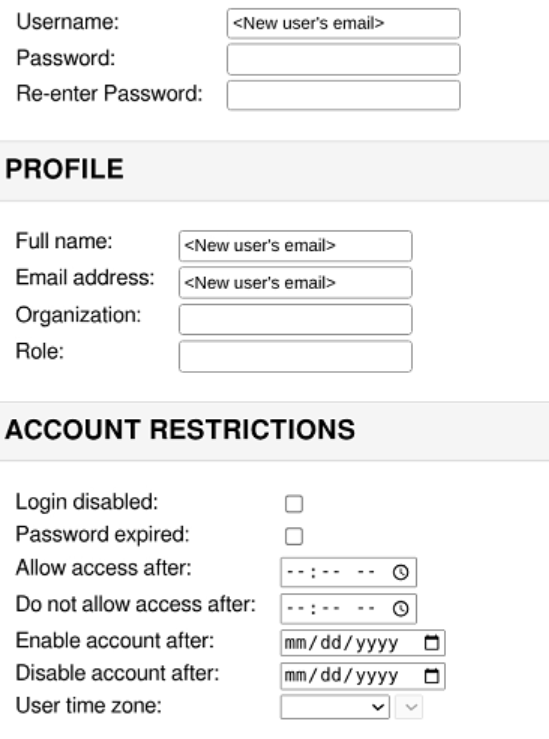
Enter the following information and then click Save
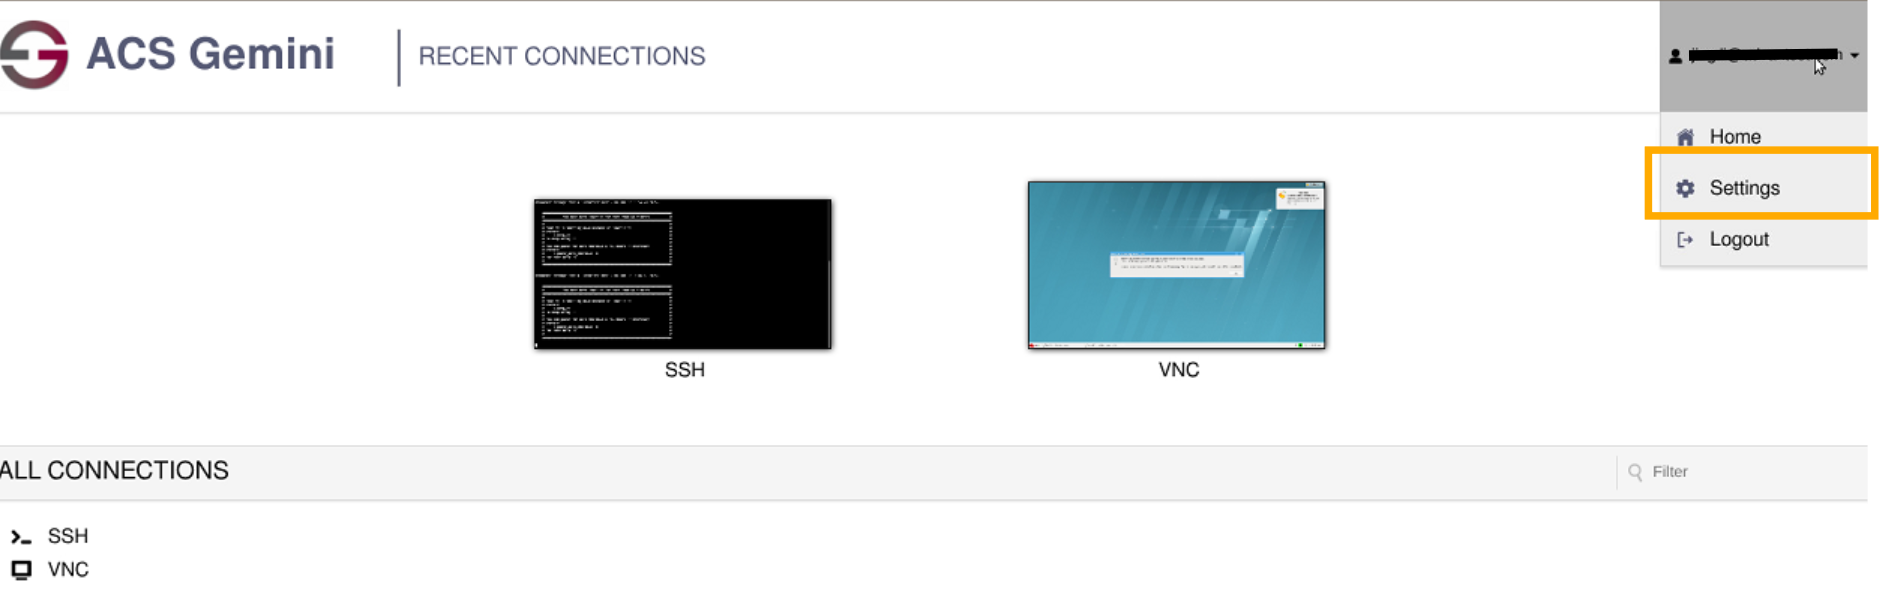
The newly added member access the VM from the dashboard#
The newly added member clicks the View button of the VM

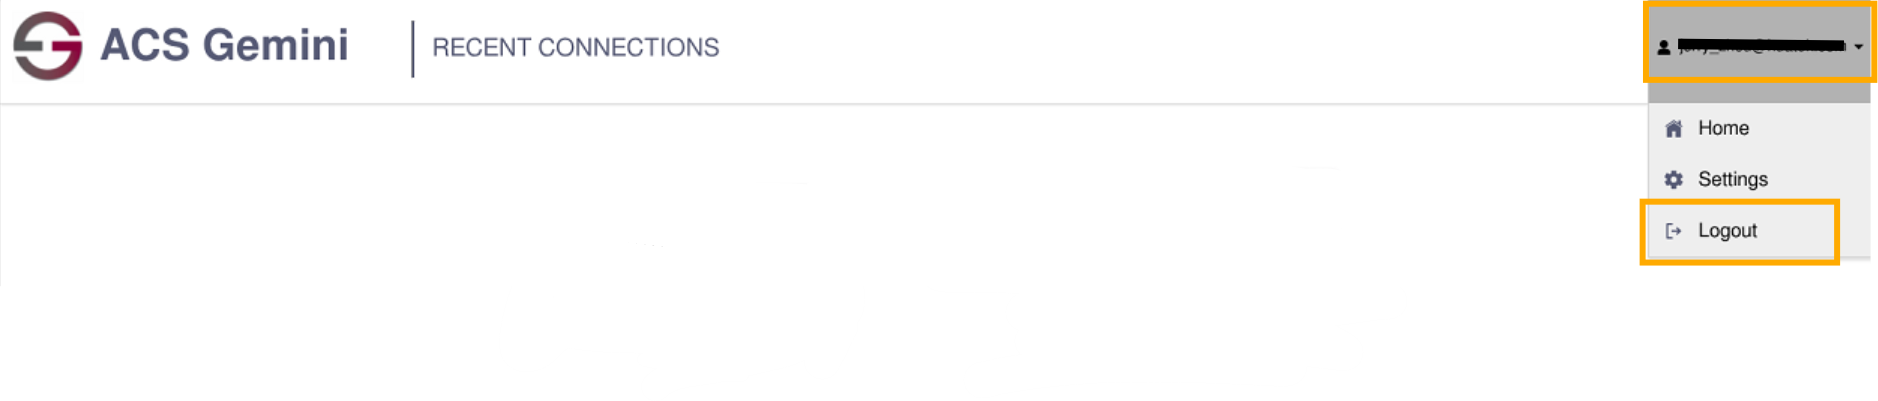
The newly added member needs to click Logout. They will be automatically logged back in, after which SSH-2 and VNC-2 will become visible.
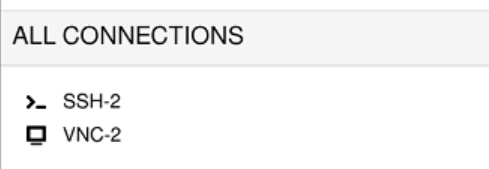
The newly added member clicks SSH-2 or VNC-2 to connect to the VM
Remove Member#
You can click the Remove button in the member list to remove an existing member

And you need to delete the previously added users
Click the user you want to delete, then scroll to the bottom and click Delete