Data Visualization & ML Insights for Application Discovery#
Purpose#
Provide an intuitive web-based interface to:
Automatic Amazon S3 Bucket Setup
Manage and interact with data stored in Amazon S3
Generate Exploratory Data Analysis (EDA) reports to understand datasets
Identify high-value features
Perform model training and prediction using AutoML (AutoGluon)
This guide walks you through environment setup, data management, EDA generation, feature selection, training, and using the trained model for predictions.
Compatibility#
Ubuntu20.4_UbuntuServer
Prerequisites#
Before you begin:
Access to an Ubuntu Server VM with VNC enabled.
A valid Gemini account (username & password) to log in to the web UI.
Quick Start#
- 1. Create Ubuntu VM.
- 2. Log in via VNC to the Ubuntu Server.
- 3. Open a browser on the server and go to https://localhost:8000.
- 4. Log in with your Gemini credentials.
- 5. Manage Amazon S3 files (Upload, Download, Delete).
- 6. Upload STDF files and convert them into structured.
- 7. Generates a global overview report to summarize dataset structure.
- 8. Select the top-N most relevant features.
- 9. Click Insights on top-N features dataset to generate an EDA report.
- 10. Select high-value features and a target column.
- 11. Click Fit to train with AutoGluon.
- 12. Download the application from S3 and use it.
Set Up the Environment (VMs)#
Create VMs: Please refer to the internal guide “Creating and managing VM” to provision the necessary Ubuntu Server VM(s).

Wait for services to initialize: After provisioning, wait ~10 minutes to allow all background services to start properly.
Access the Web Interface#
Log in to VNC on the Ubuntu Server.
Open a browser on the server and navigate to:https://localhost:8000
Sign in with your Gemini username and password.
Manage Data in Amazon S3#
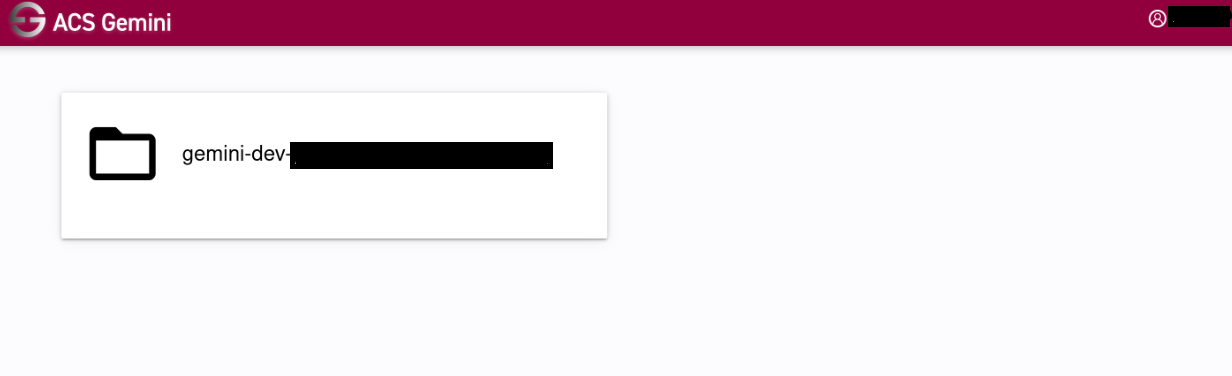
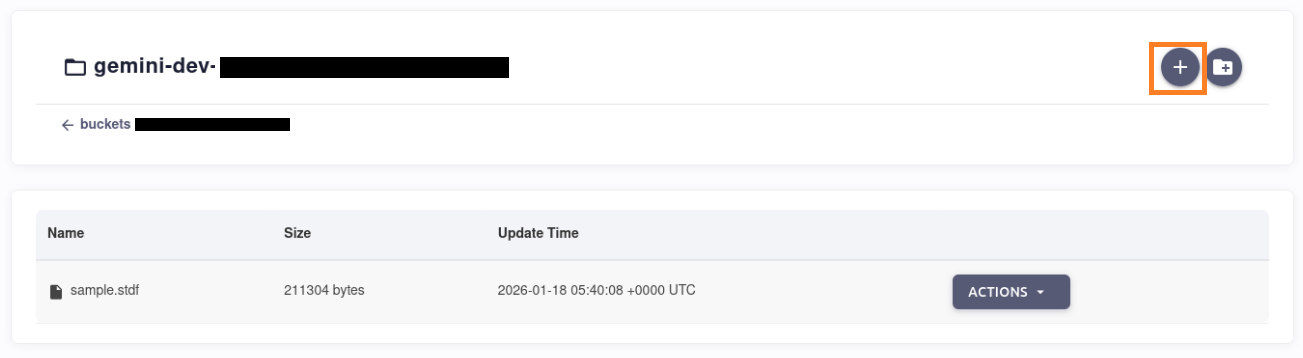
Once logged in, you’ll land on the dashboard that lists your S3 buckets.
Open a bucket to view its files/objects.
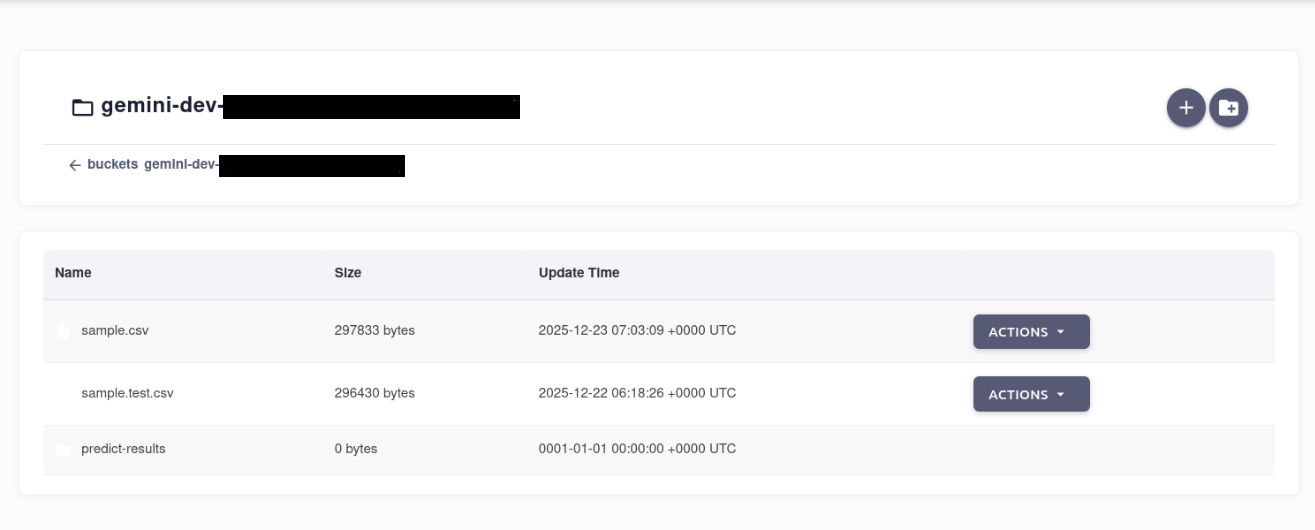
Use the following actions:
Upload (max size 2GB at current stage)
Download
Delete

ML Insights for Application Discovery#
Refer to the flowchart below to implement ML Insights for Application Discovery
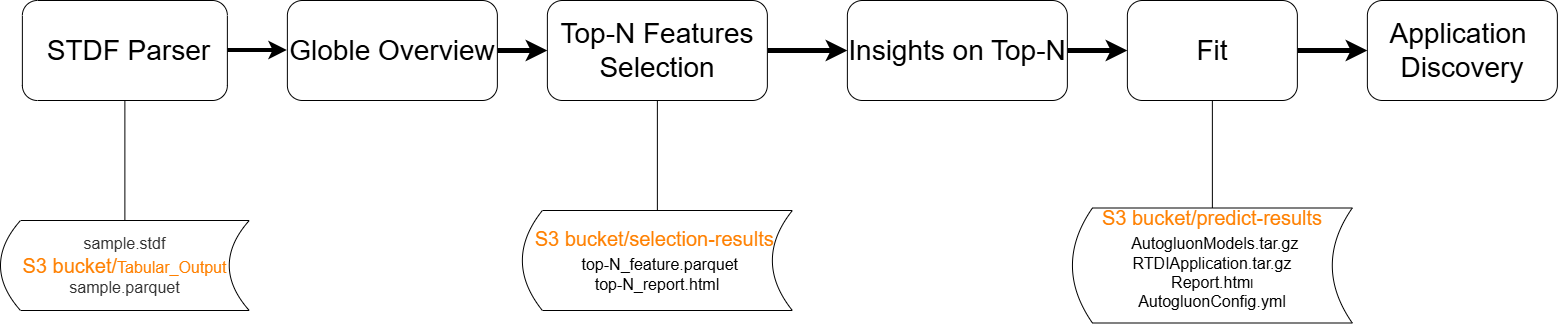
STDF Parser → Parses STDF input files from the S3 bucket and converts them into structured, analysis-ready datasets.
Global Overview → Generates a global overview report to summarize dataset structure, basic statistics, and variable information.
Unsupervised top-N Features selection → Automatically selects the top-N most relevant features and generates a reduced feature dataset and a selection report.
Correlation on top-N Features → Provides detailed insights and analysis based on the selected top-N features.
Fit → Trains models using the selected features and saves prediction artifacts and model outputs.
Application discovery → Explores downstream applications and actionable insights based on the fitted models and prediction results.
STDF Parser#
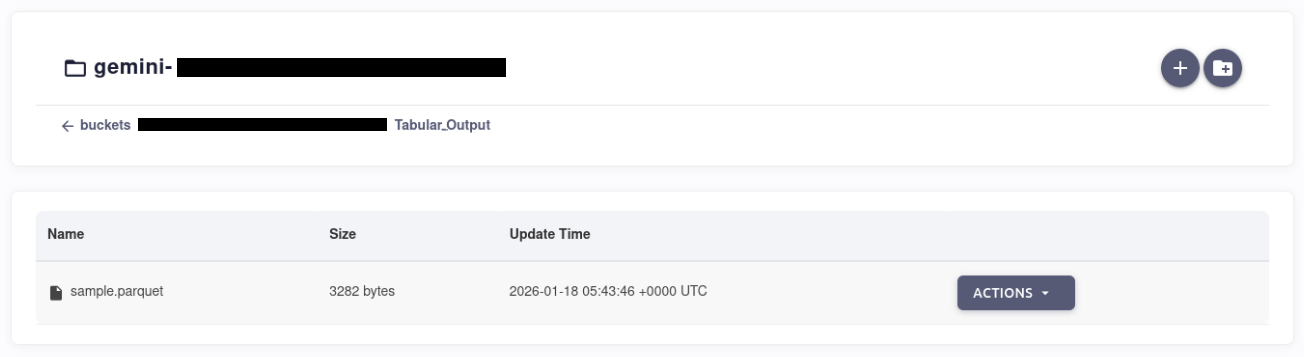
In the S3 bucket, upload the STDF file xxxx.stdf
Wait a few minutes for the STDF parsing to complete, then open the “Tabular_Output” folder. You will find the generated Parquet file named xxxx.parquet.
Global Overview#
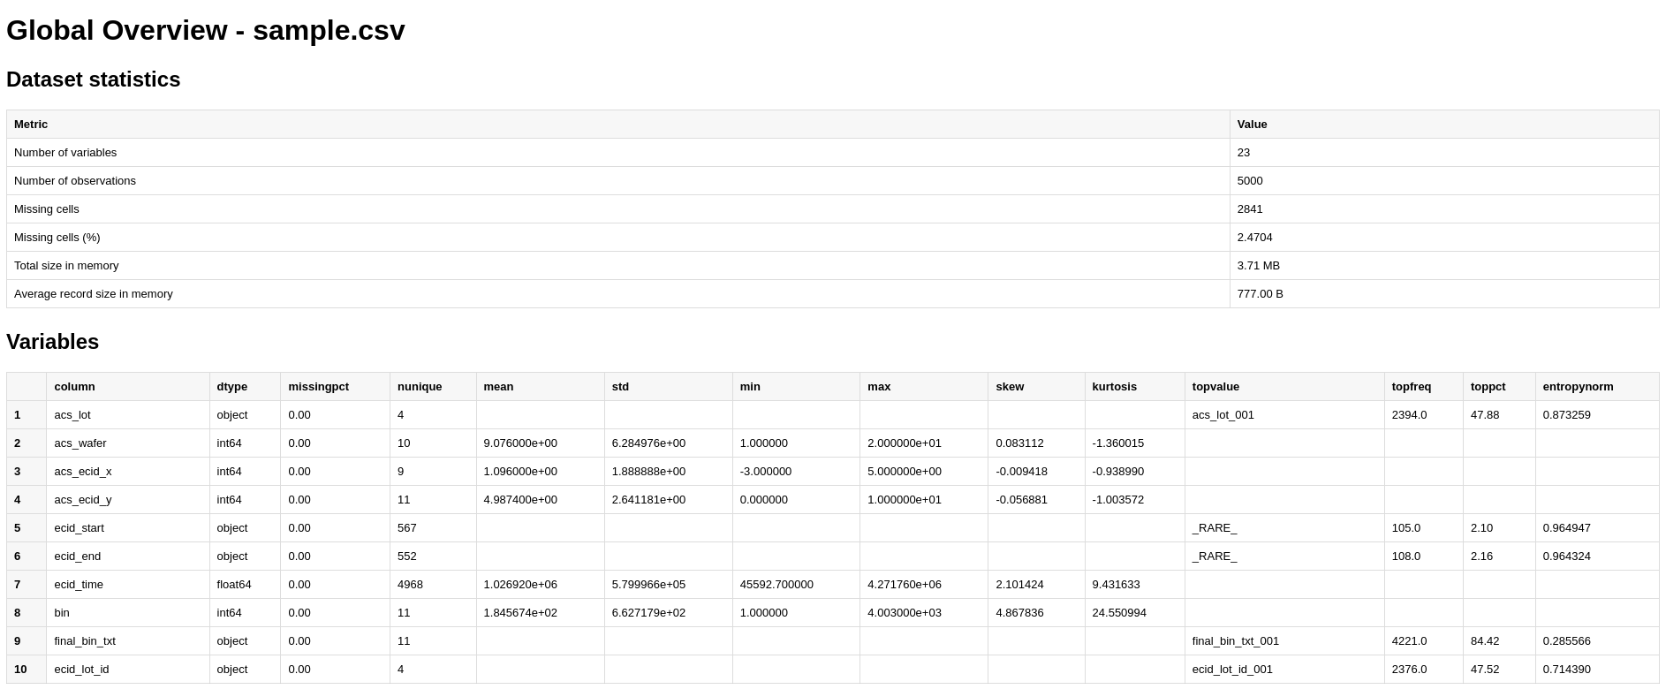
Click the Overview button to generate an overview report.
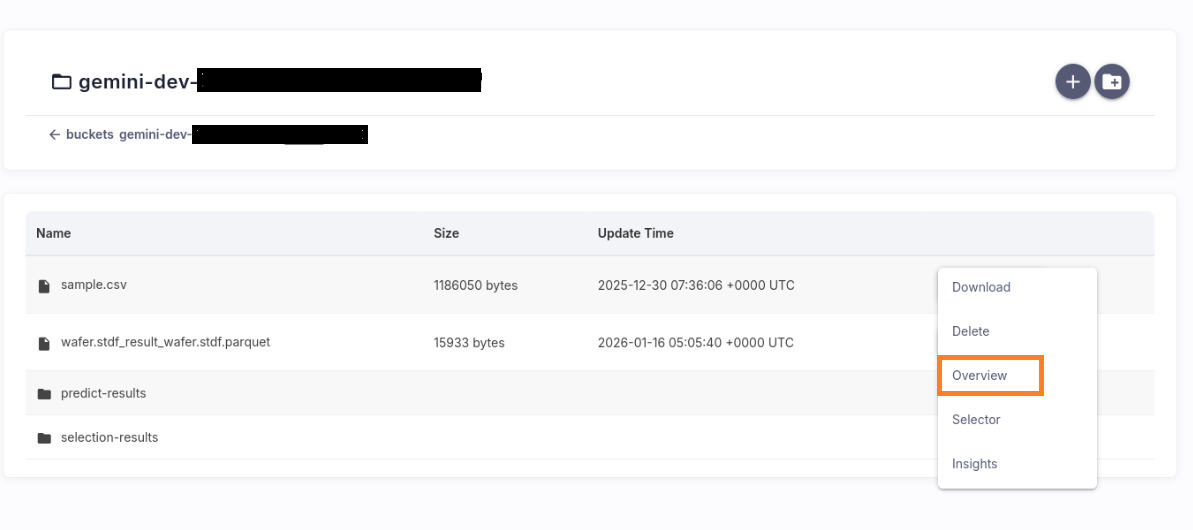
The overview report includes:
Dataset statistics.
Variables.
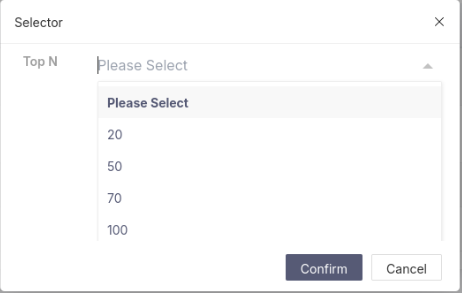
Unsupervised top-N Features selection#
Click the Selector button, choose a Top‑N value, and the system will automatically generate a Top‑N feature dataset and a feature selection report.
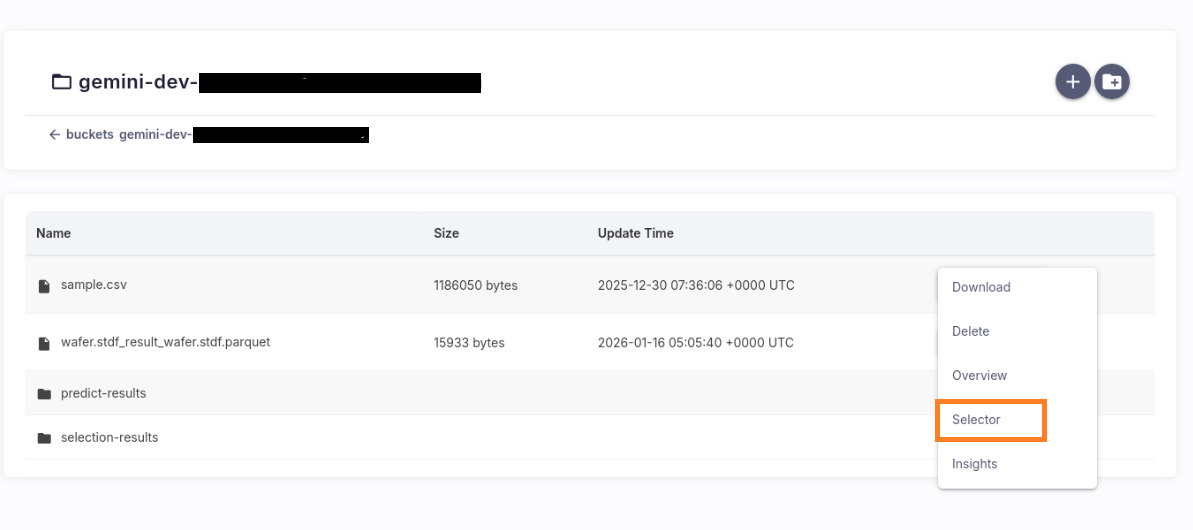
The feature selection report includes:
Filtered Features
Per-feature Score
Selected Features
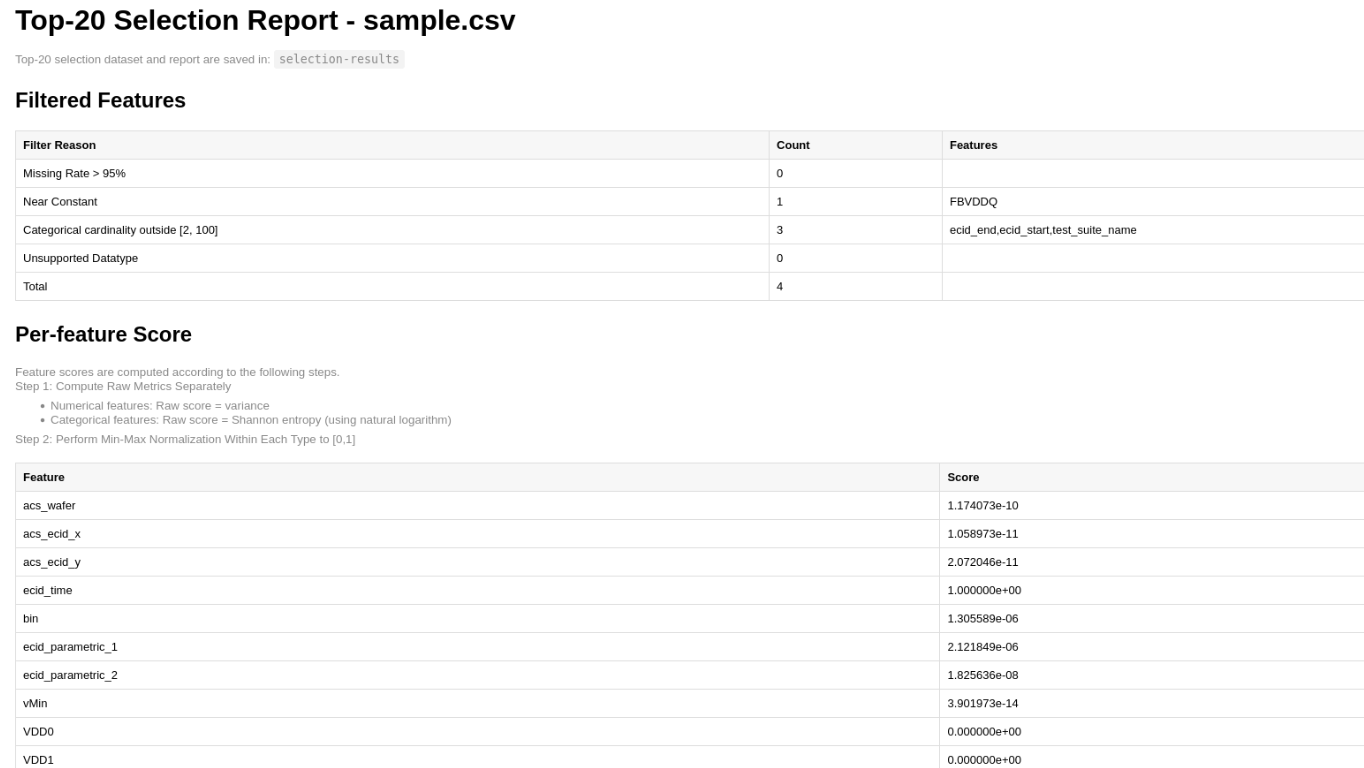
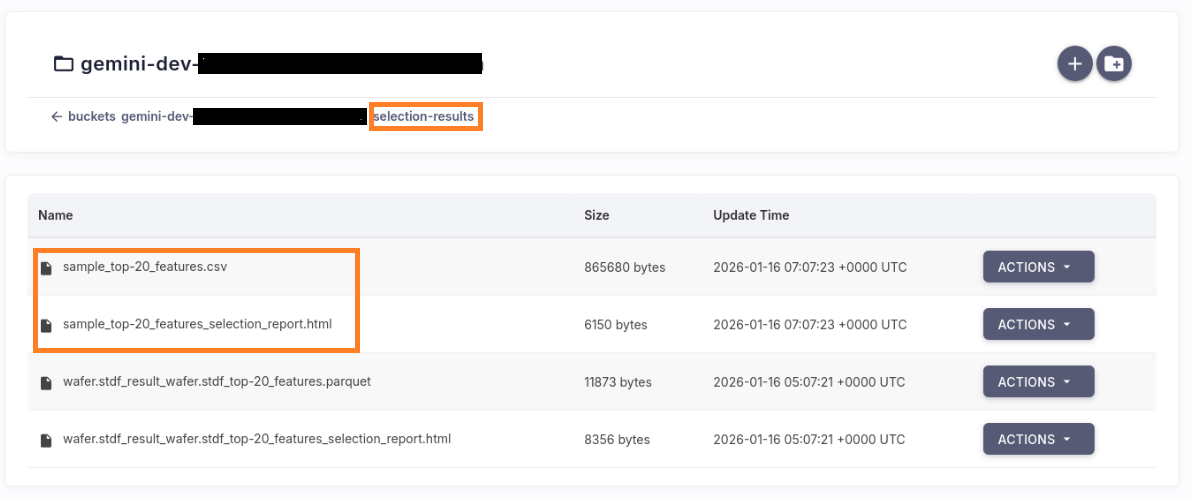
The generated top-N features dataset and feature selection report are saved to the S3 bucket/selection-results directory.
Correlation on top-N Features#
Click the Insights button to generate the EDA report.
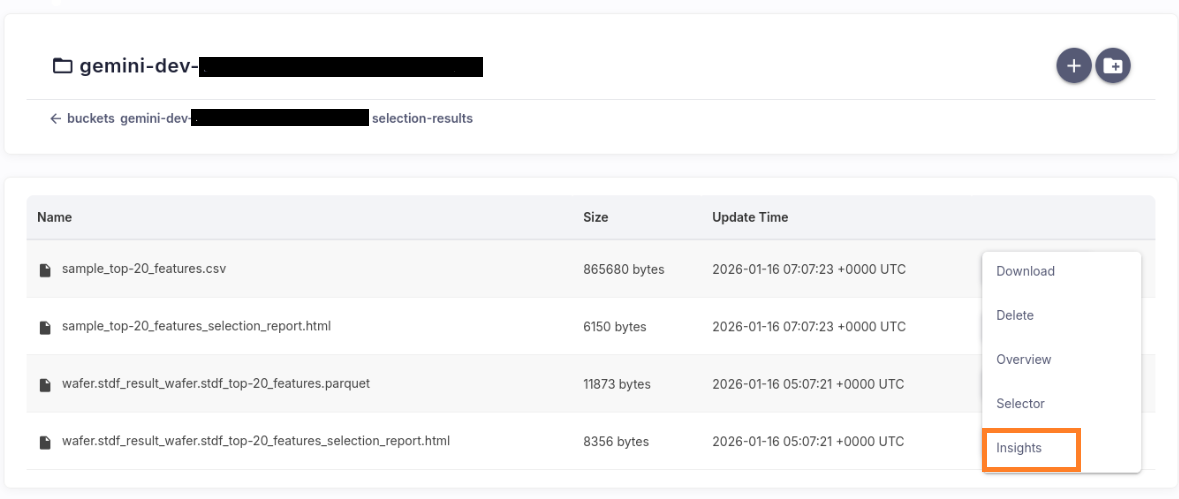
Important: The Insights feature supports CSV and Parquet files only. Reports generated from other formats may be invalid or not meaningful (File Format Guidelines).
When processing completes, a new web page opens with the EDA report.
Select High-Value Features & Target#
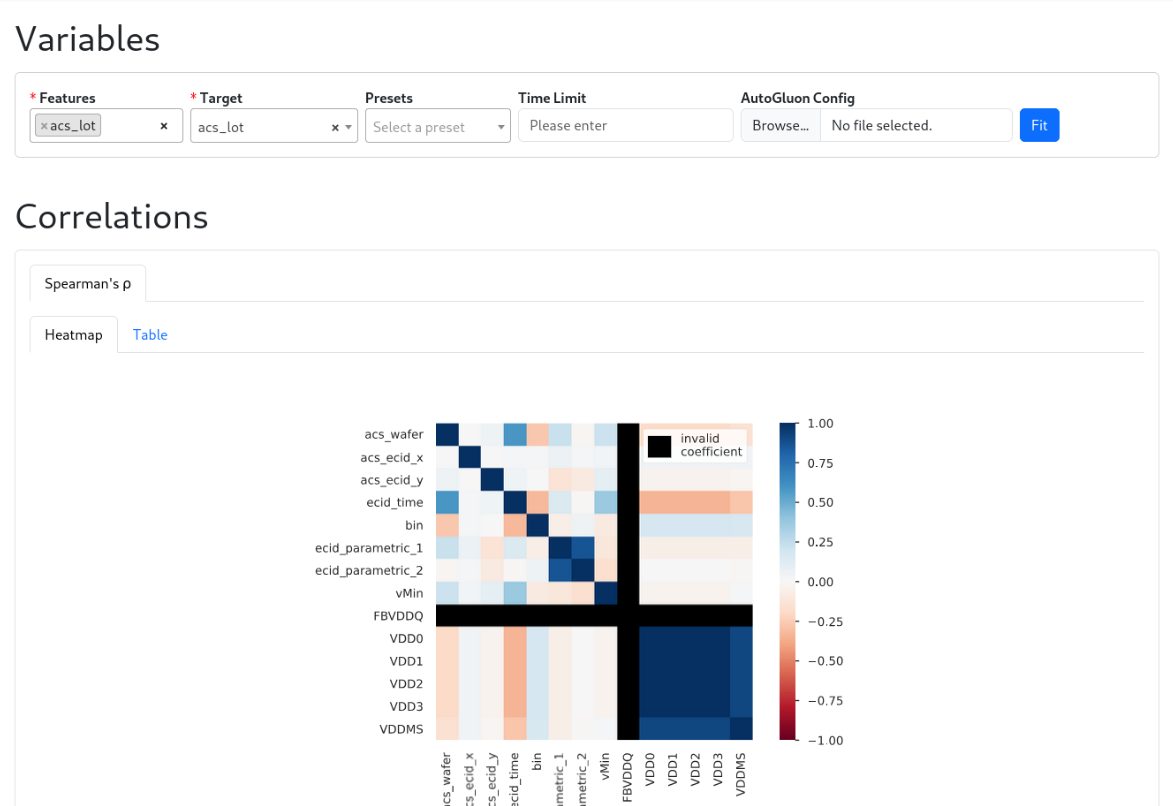
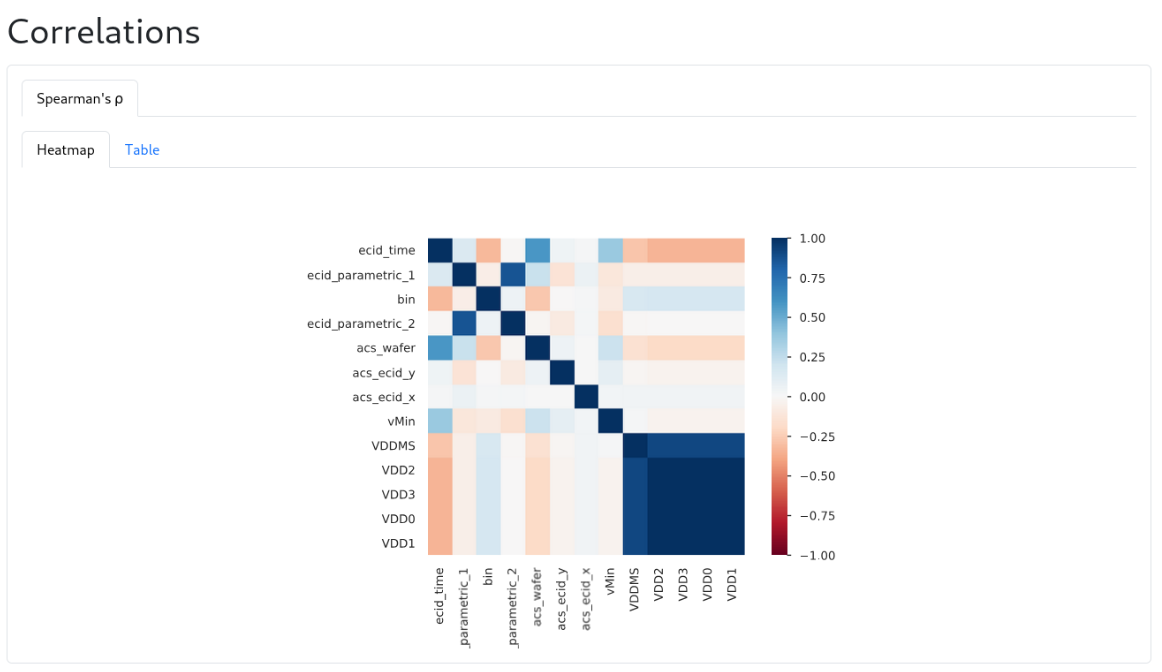
Use the EDA report Correlations to identify valuable features:
Steps & Tips
Identify the target column: Confirm the target feature used in the analysis.
Inspect target‑focused correlations (Spearman)
Review Spearman correlations between each feature and the target.
Spearman correlation is robust to non‑linear but monotonic relationships and less sensitive to outliers.
A low absolute correlation suggests limited predictive value for single‑feature models.
Correlation does not imply causality, but is a strong signal for feature relevance
Control multicollinearity
Check feature-to-feature correlations.
If two features have correlation > 0.9, keep one prefer the more stable and interpretable.
Finalize selections
Pick high-value features
Choose the target feature
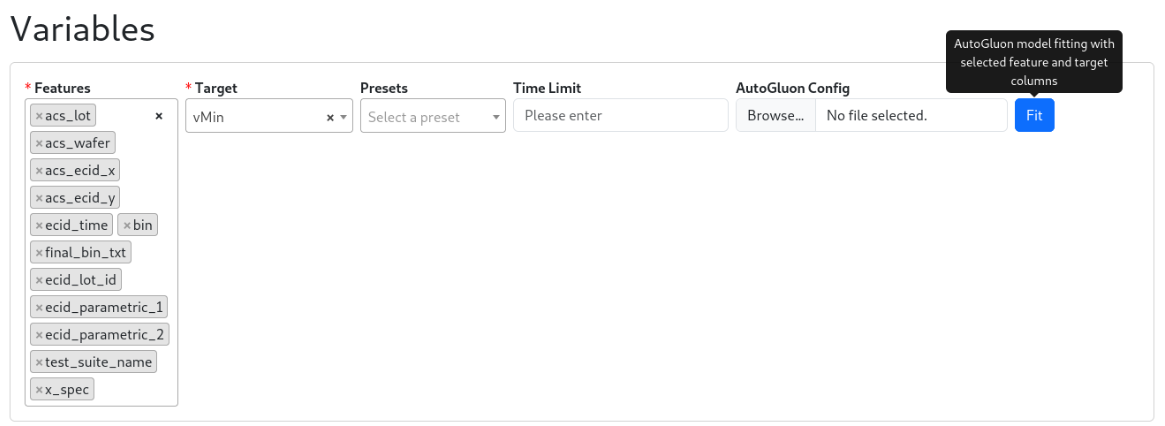
Train a Model with AutoGluon for Application Discovery#
Training is not only about producing a high-performing predictor. It validates the model by exploring possible feature columns and target definitions and by tuning training parameters to see how these choices shape performance. It is a key step in application discovery based on training results, and it helps determine where and how it can be integrated into your application.
After selecting the feature columns and target column, click Fit to start training and begin application discovery using the default medium_quality preset with no fixed time limit. You can quickly set presets and time_limit on this page or upload an AutoGluon YAML config.
  # AutogluonConfig.yml(example)
  # ===== Global training strategy =====
  presets: medium_quality          # Options: ["medium_quality","high_quality","best_quality",...]
  time_limit: 180                  # Seconds; e.g., 180. Set to null (or omit) for no time limit.

  # ===== Optional other parameters AutoGluon supports =====
  # problem_type: regression       # Optional; AutoGluon can infer from the label.
  # eval_metric: root_mean_squared_error  # Optional; common choice for regression.

  # auto_stack: false              # Enable to use bagging/stacking for potentially higher accuracy.
  # refit_full: true               # Refit the best model on the full dataset after training.
  # num_bag_folds: 5               # Used when auto_stack or bagging is enabled.
  ......
The system prepares the training dataset based on your selections.
AutoGluon automatically trains the model in the background. Training time varies by dataset size, the selected preset, any time limit you set, and other hyperparameters.
A new page opens when training and evaluation finish, showing the model analysis report:
Key training parameters
Evaluation results
Save path of the trained model in AWS S3
It supports application discovery by helping you assess whether the model’s quality and behavior are suitable for your application.
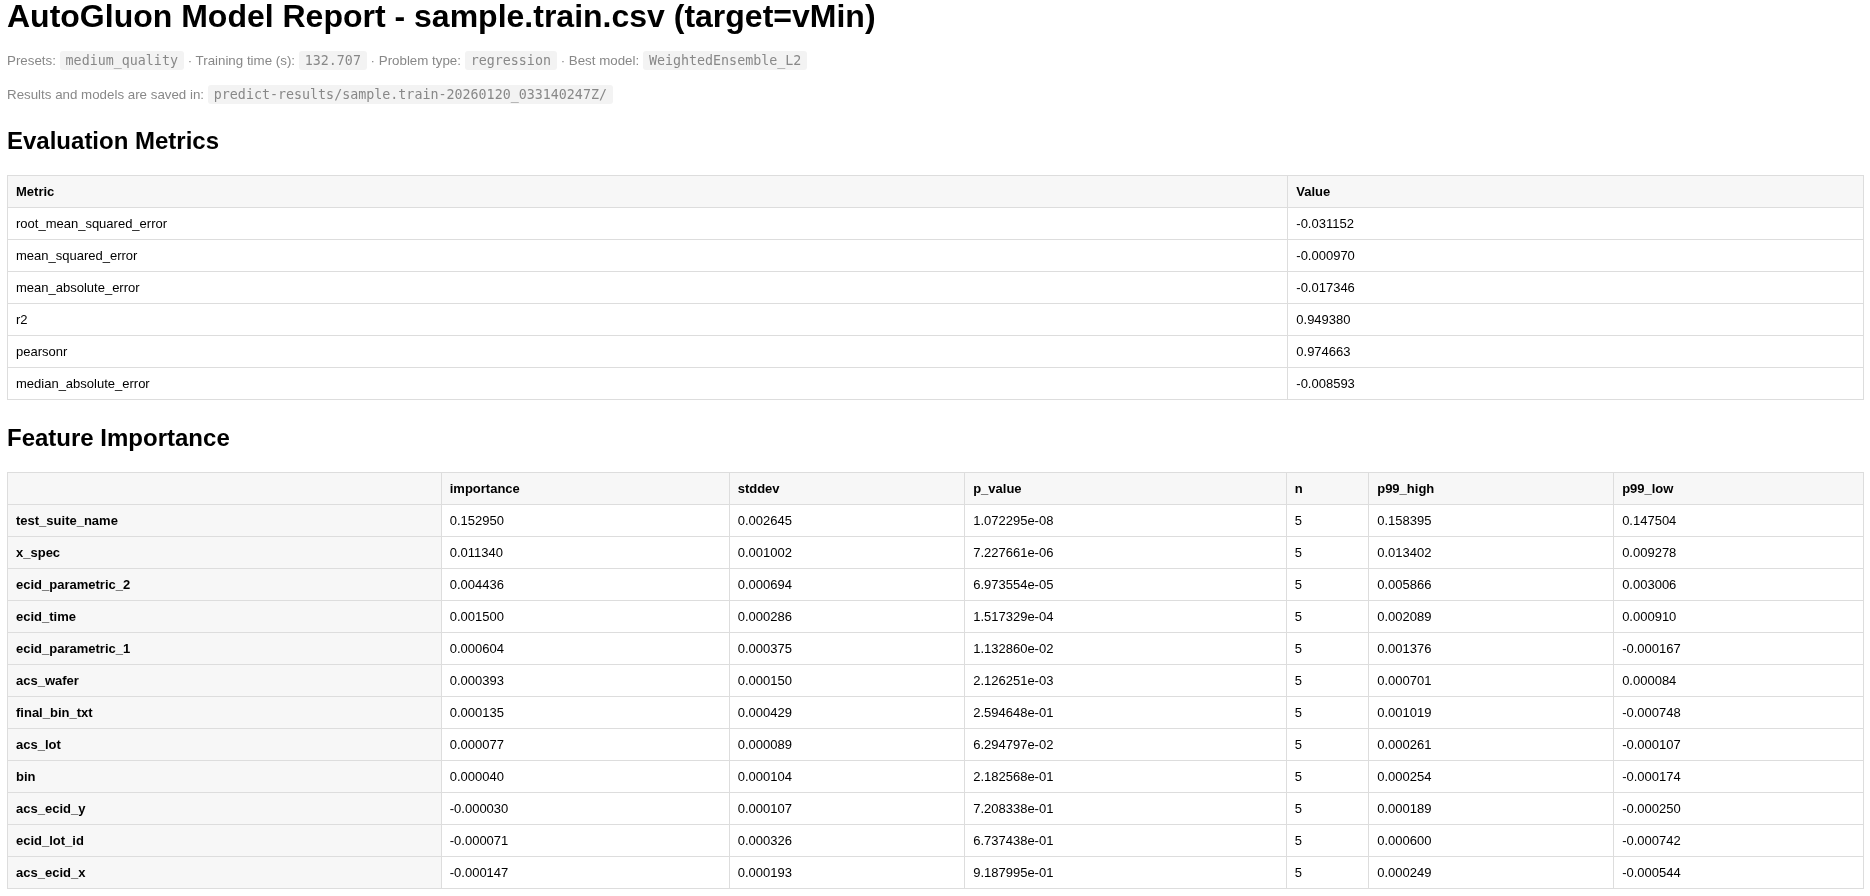
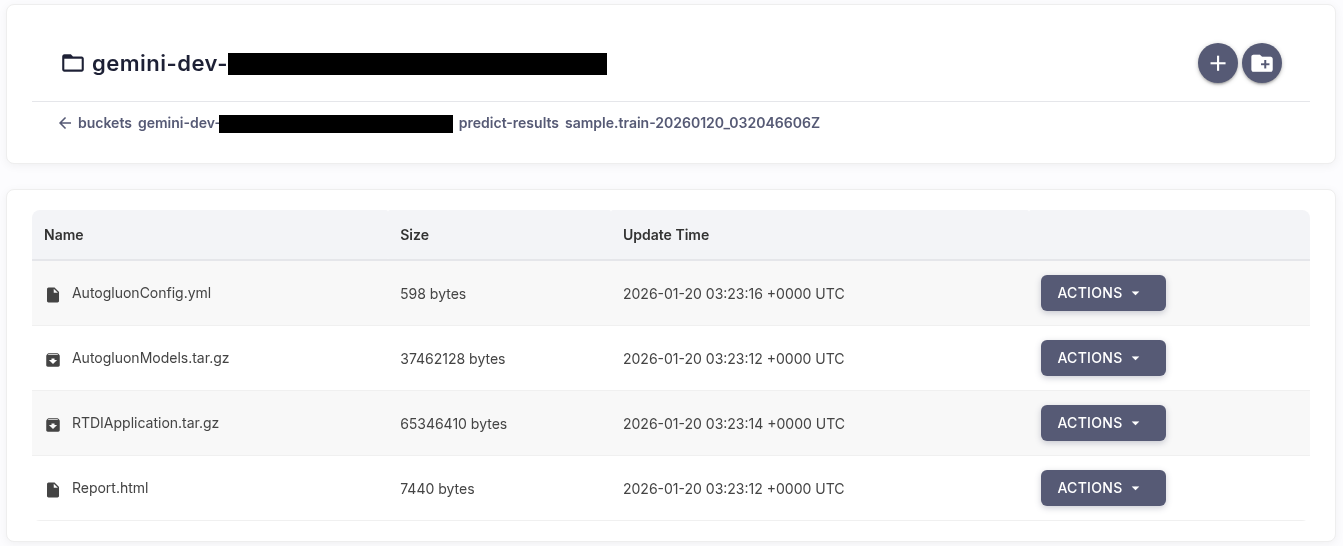
The report explicitly provides the S3 paths to the training report and the model artifacts. They are saved in your bucket under the predict-results folder, in a subfolder named with the training dataset name and a timestamp.
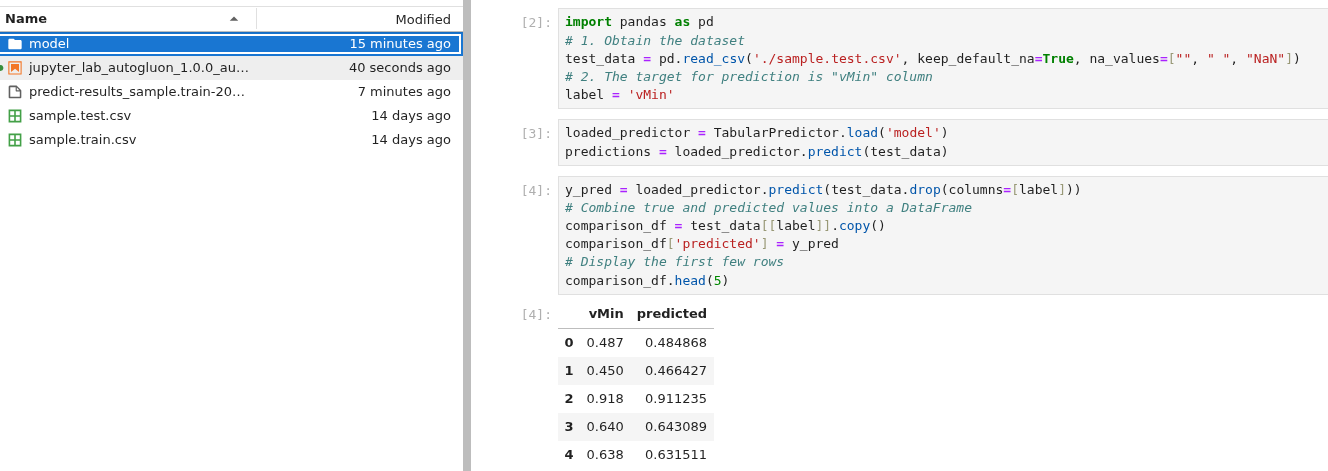
If you want to fine tune the model further, in addition to adjusting parameters during Fit, JupyterLab can also be utilized to visually complete the training, prediction, and evaluation of the AutoGluon model. You can refer to the basic workflow below to load the trained model and run inference:
Open a browser on the server and go to http://localhost:8899/lab.
Download AutogluonModels.tar.gz from the training folder in S3 to your local machine and upload it to JupyterLab.
Extract the archive to reveal the model directory.
Load and predict with the model:
# 1) Load your inference/test dataset (Ensure it uses the same feature columns and compatible data types as in training)
test_data = pd.read_csv('sample.test.csv', keep_default_na=True, na_values=["", " ", "NaN"])
# 2) Load the trained predictor (extracted 'model' folder)
loaded_predictor = TabularPredictor.load('model')
# 3) Generate predictions
predictions = loaded_predictor.predict(test_data)
# 4) (Optional) Inspect predictions
print(predictions.head())
By default, AutoGluon uses the best-performing model to generate predictions. Make sure the inference data has the same feature columns and compatible data types as in training. If the model loading and prediction are successful, the result can be seen:
For detailed guidance on model training, prediction, and evaluation with AutoGluon, please refer to “Model training, prediction and evaluation”. This section covers:
Loading and preparing your dataset
Training the AutoGluon TabularPredictor model
Making predictions on test data
Evaluating model performance using various metrics
Use the Trained Model in Reference Applications#
With the model trained, the next step is to use it in reference applications. This phase provides a customizable example for inspecting inference results. You can confirm the model’s performance and behavior in realistic workflows and validate outcomes at the selected integration points.
Ensure you have prepared the ACS RTDI virtual environment. In this example, we use Unified Server as the image repository. Please refer to “Use Unified Server as a Container Registry”.
Download the RtdiApplication.tar.gz archive from the S3 training folder, rename it to RtdiApplication.tar.gz and place it under ~/apps/ on the Host Controller.
cd ~/apps/
tar -zxf RtdiApplication.tar.gz
Build the Docker image:
cd ~
curl http://10.44.5.139/docker/python_3.10.12-slim.tar -O
sudo docker load -i python_3.10.12-slim.tar
cd ~/apps/application/autogluon-model-app/
sudo docker build ./ --tag unifiedserver.local/example-project/autogluon-model-app:latest
Push the Docker image to the Unified Server:
sudo docker push unifiedserver.local/example-project/autogluon-model-app:latest
Configure the Nexus for the ag-app container deployment:
gedit /opt/acs/nexus/conf/images.json
{
    "selector": {
        "device_name": "demo RTDI"
    },
    "edge": {
        "address": "<Edge IP>",
        "registry": {
            "address": "unifiedserver.local",
            "user": "robot$example_account",
            "password": "<Password>"
        },
        "containers": [
            {
                "name": "autogluon-model-app",
                "image": "example-project/autogluon-model-app:latest",
                "environment" : {
                    "ONEAPI_DEBUG": "3",
                    "ONEAPI_CONTROL_ZMQ_IP": "<Host Controller IP>"
                }
            }
        ]
    }
}
gedit /opt/acs/nexus/conf/acs_nexus.ini
[Auto_Deploy]
Enabled=false
...
[GUI]
Auto_Popup=true
To apply the modified configuration, restart Nexus:
sudo systemctl restart acs_nexus
Run the Test Program
cd ~/apps/application/
sh start_smt8.sh
For instructions on how to run the Test Program, please refer to “DPAT demo application on RTDI with SmarTest 8” -> “Run the SmarTest Test Program”. If you need to select the program, it is located at ~/apps/application-vmin-v3.1.0/client/SMT8/exampleTML, and you should run examplePredictVmin.
You can view the inference results and search optimization in the console log.

Appendix: File Format Guidelines#
To ensure:
Header row present with unique column names
Consistent data types per column
No merged or multi-line cells
Proper encoding
Avoid trailing separators or irregular row lengths