VM Management#
Purpose#
Establish your virtual RTDI development environment by creating and managing multiple virtual machines (VMs), including Host Controller, Edge Server, and Unified Server.
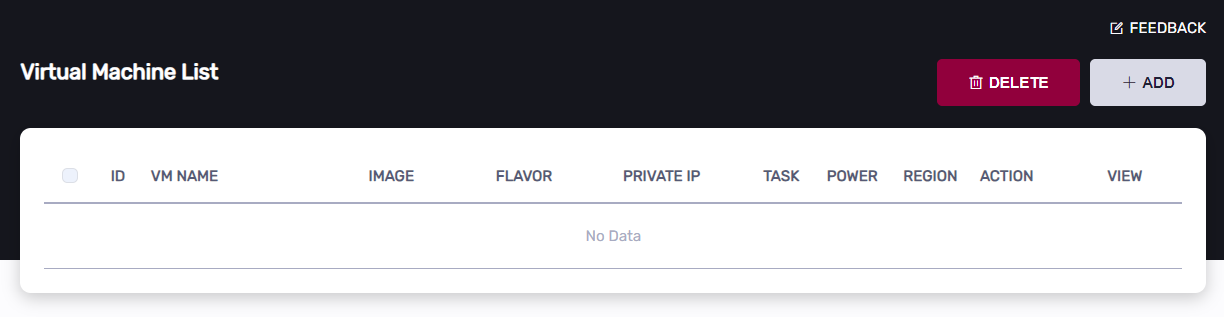
Creating and managing VM#
Creating VM#
Click the “ADD” button at the top right of the “Virtual Machine” dashboard page
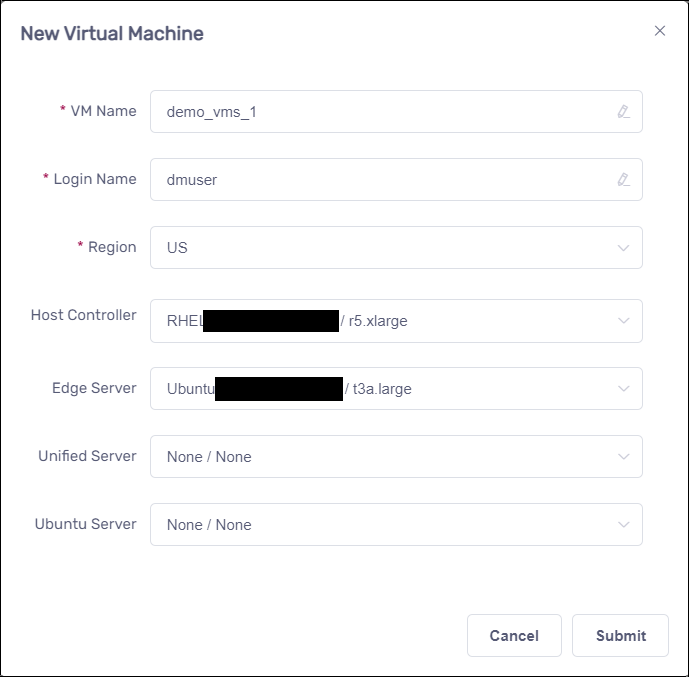
In the “New Virtual Machine” dialog, enter name values in “VM Name”, “Login Name”, select “Region”, “Host Controller” and “Edge Server” image, then click the “Submit” button.
Waiting for VM creation

Once the creation is completed, the “Creation succeeded” prompt will appear
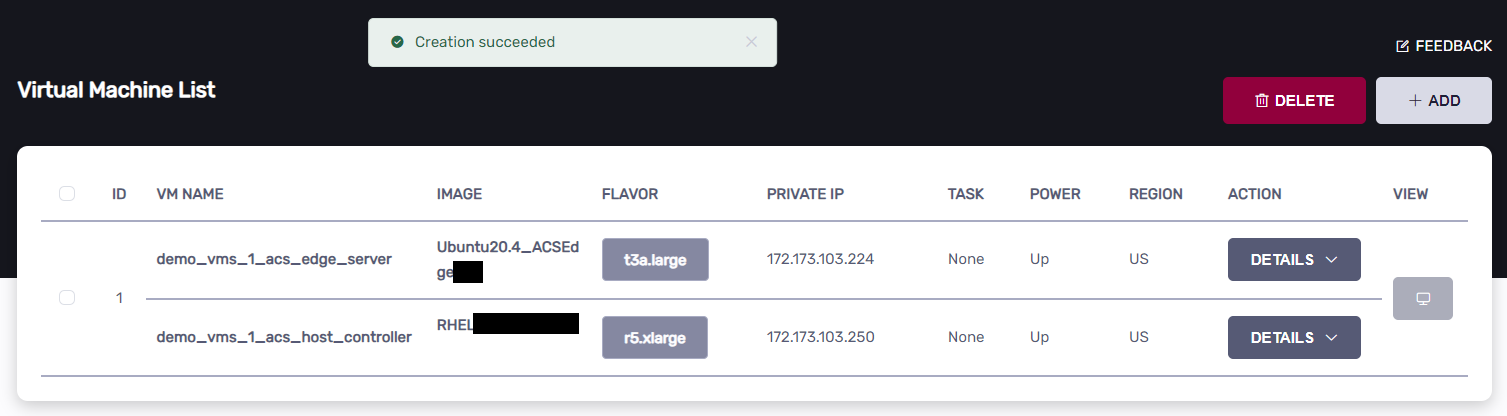
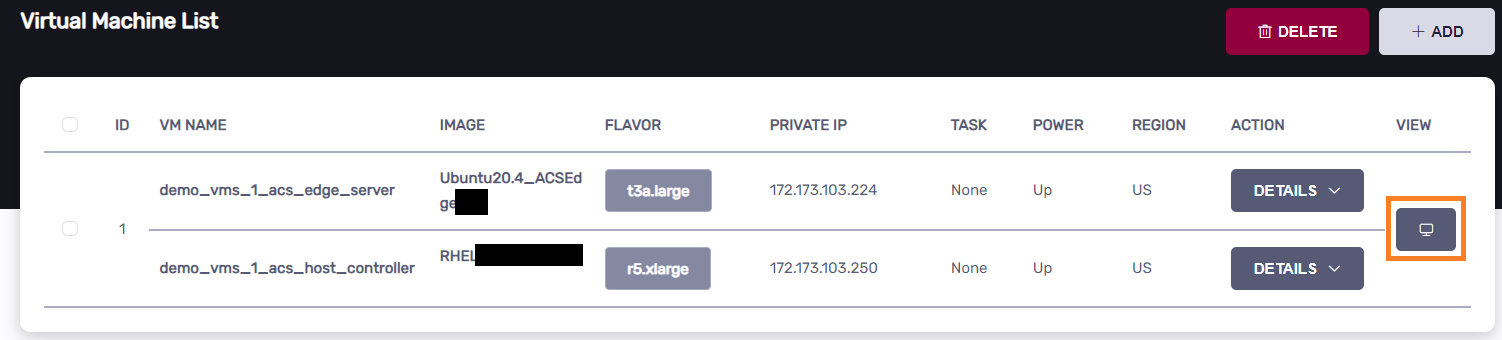
After creating the VM, wait for it to be ready to connect
“POWER” status is Up
“VIEW” button is enabled
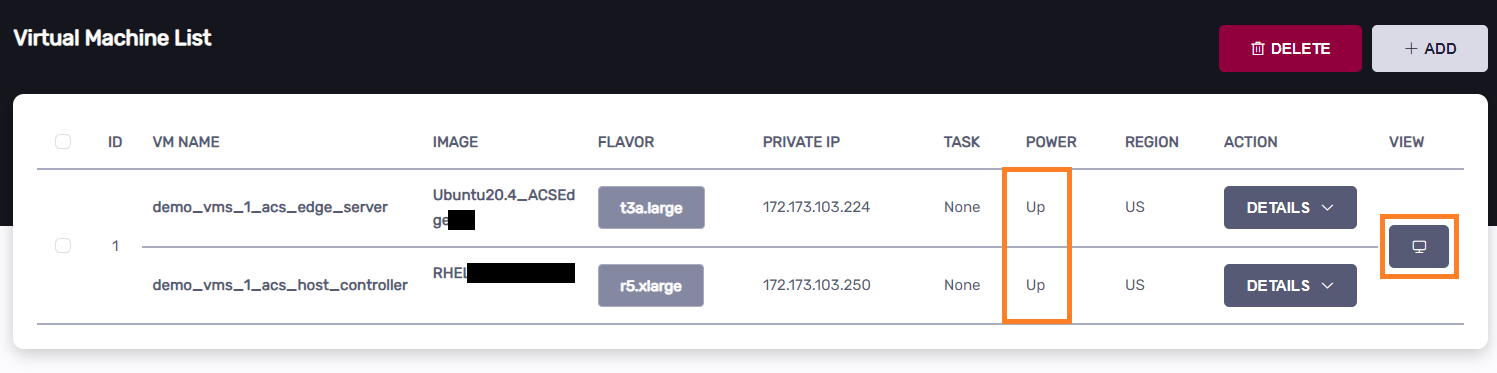
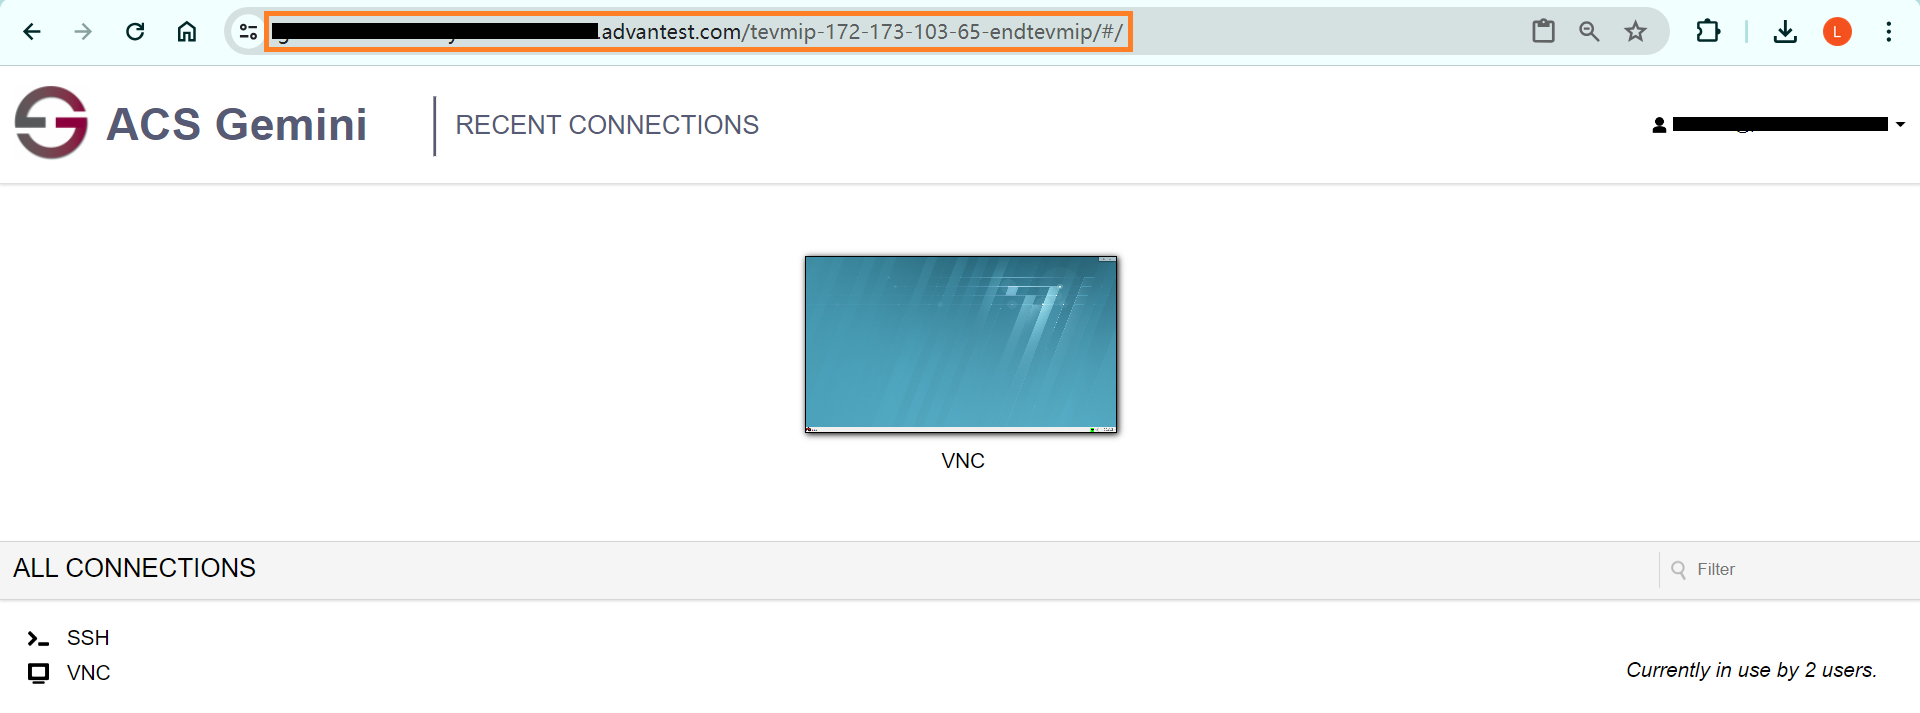
Accessing VM#
If the VM is ready, click the “VIEW” button to connect to the VM
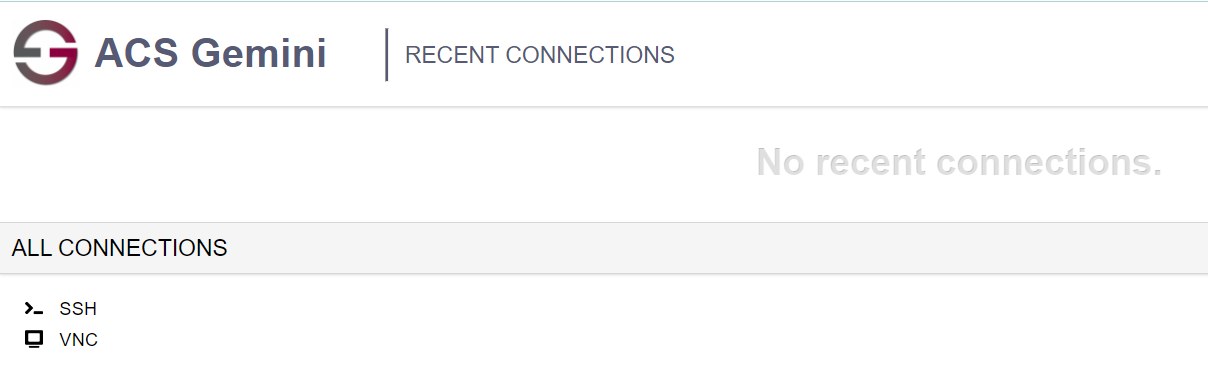
Connect to the Host Controller VM by clicking the “VNC” or “SSH” under “ALL CONNECTIONS”
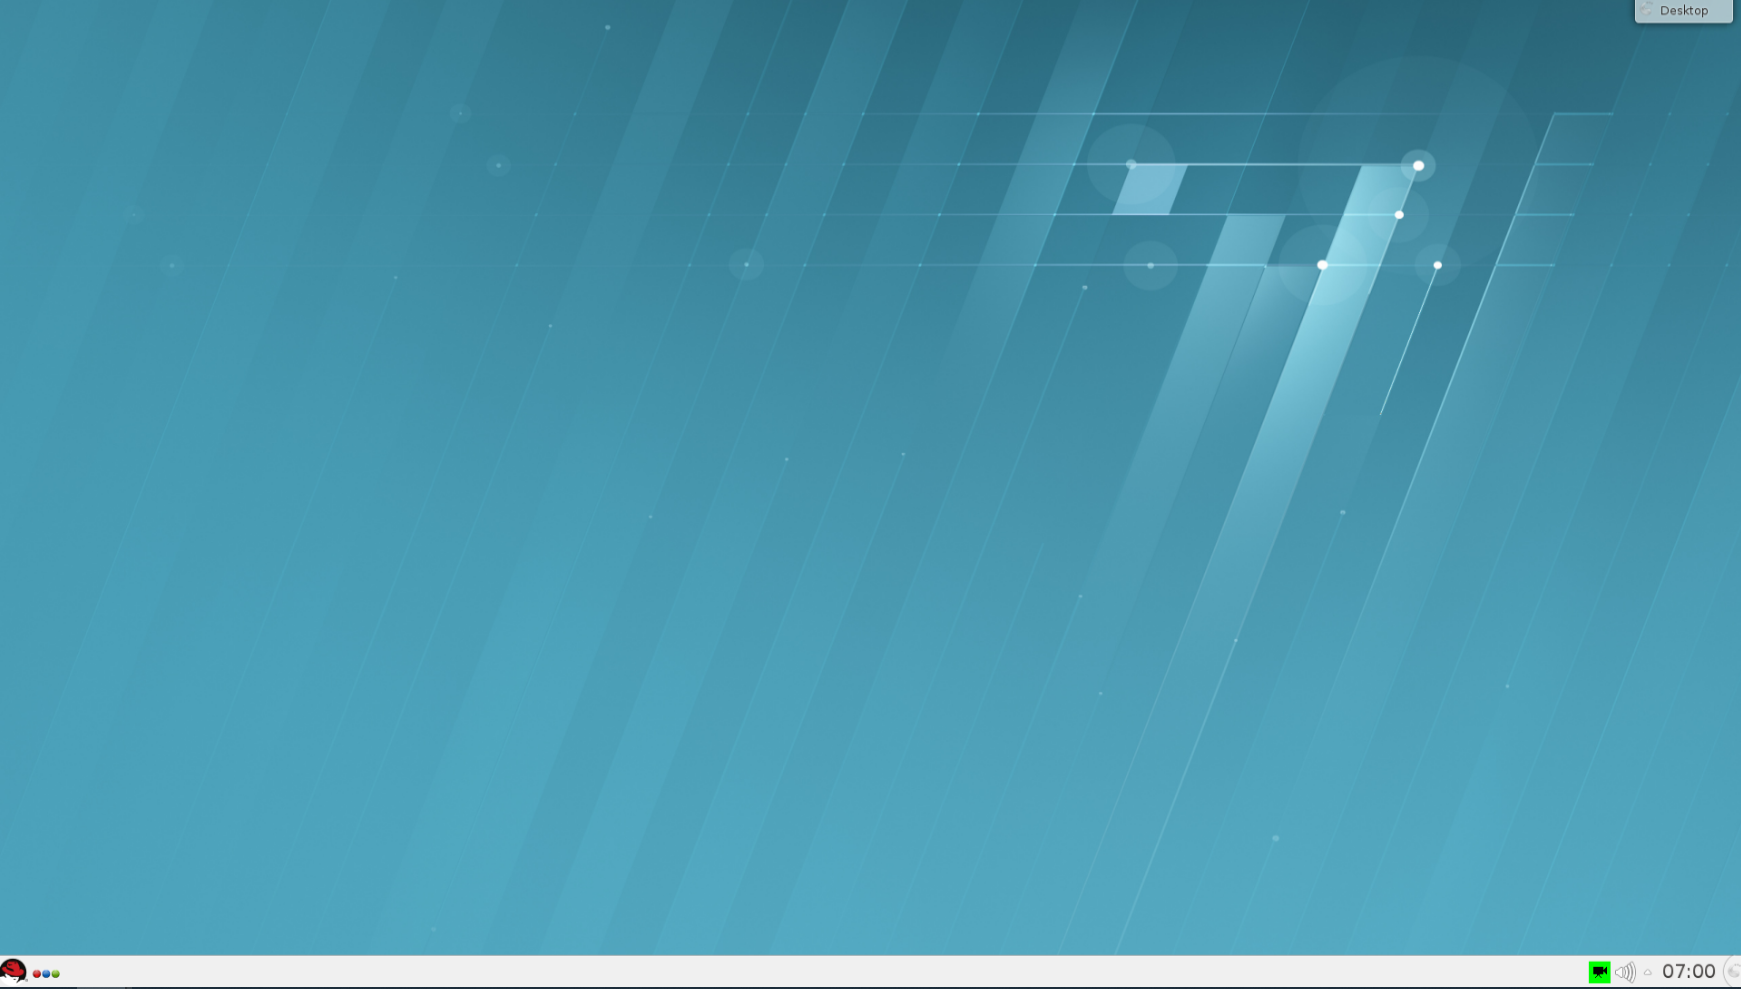
For example, below is the VNC desktop
Transferring files#
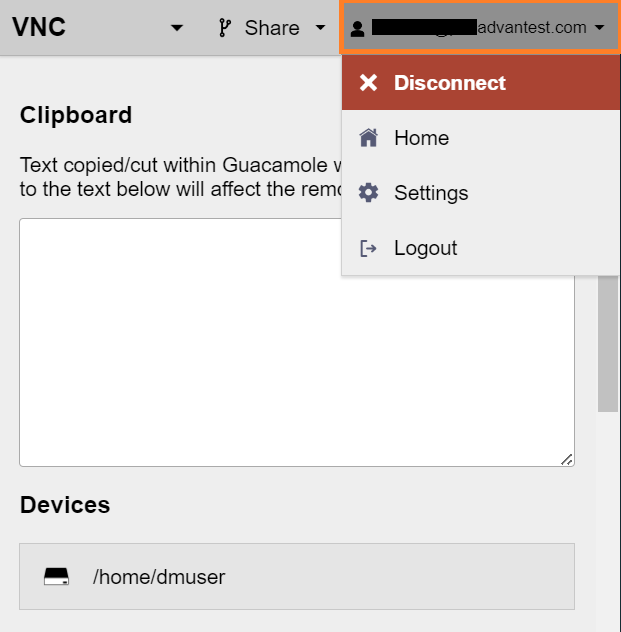
In VNC or SSH session, press Ctrl+Alt+Shift to open the management sidebar
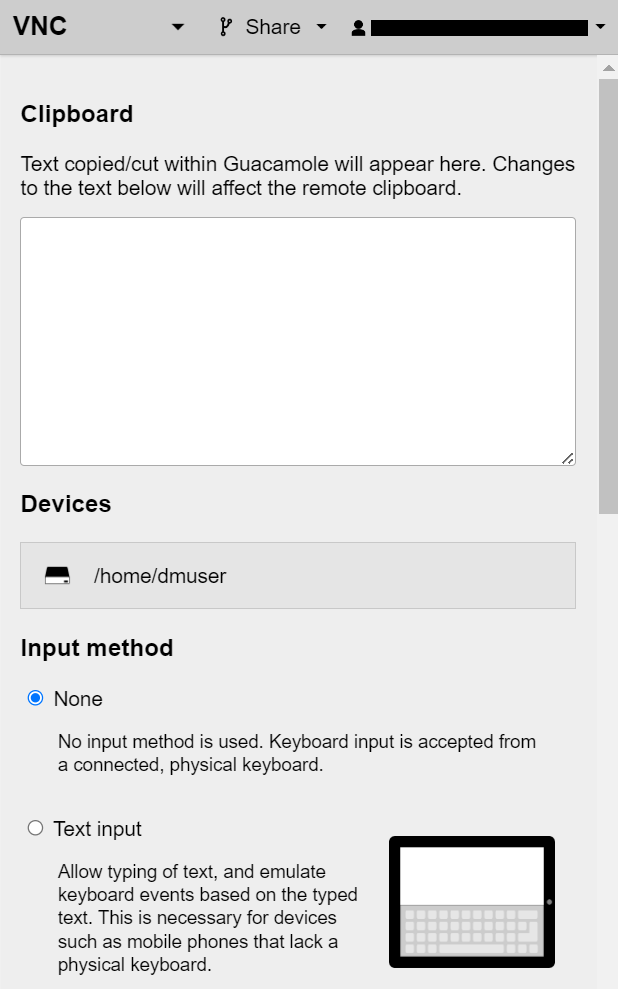
Downloading file#
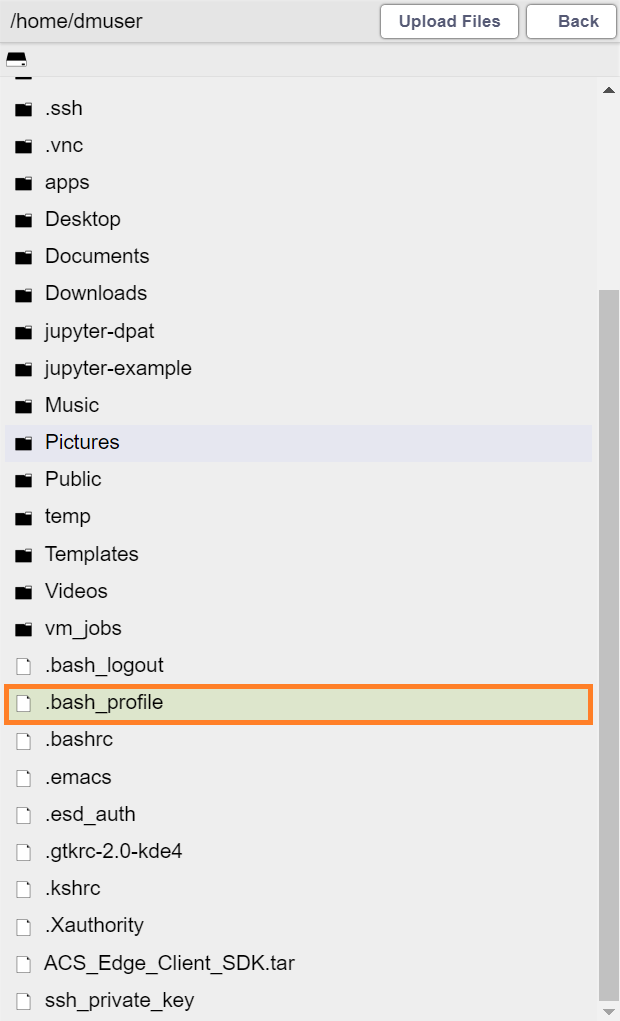
Click “Devices” to enter into your home directory
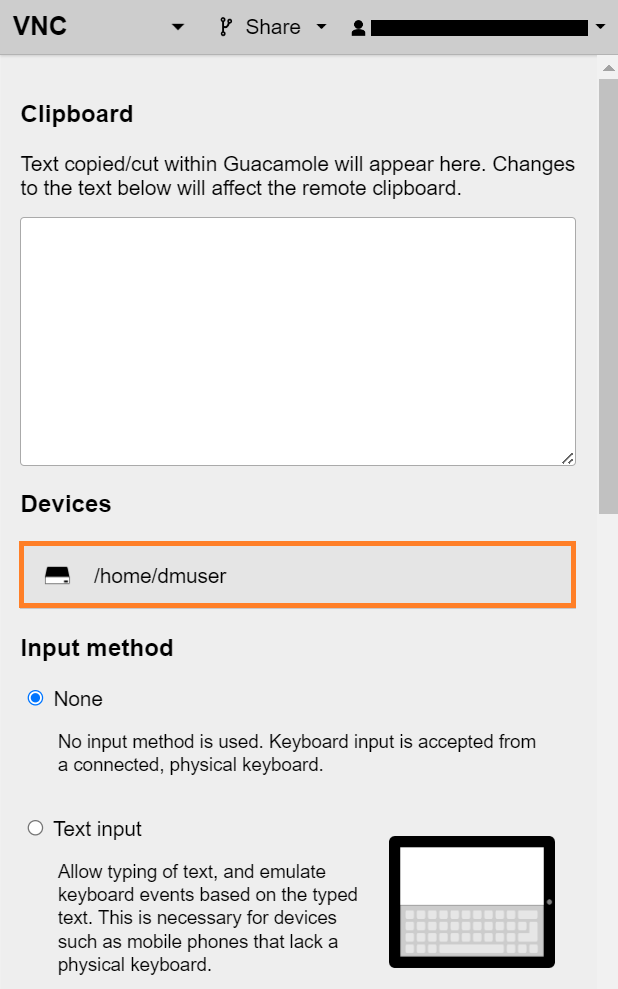
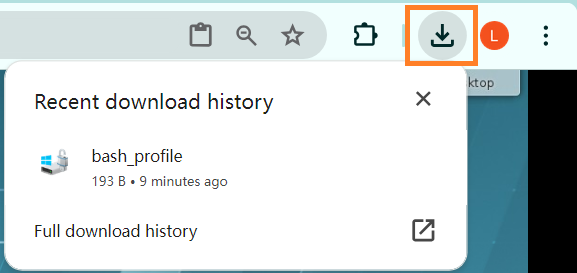
Double-click the file you want to download
File will be downloaded, you can confirm in “Recent download history” by clicking the browser’s download button
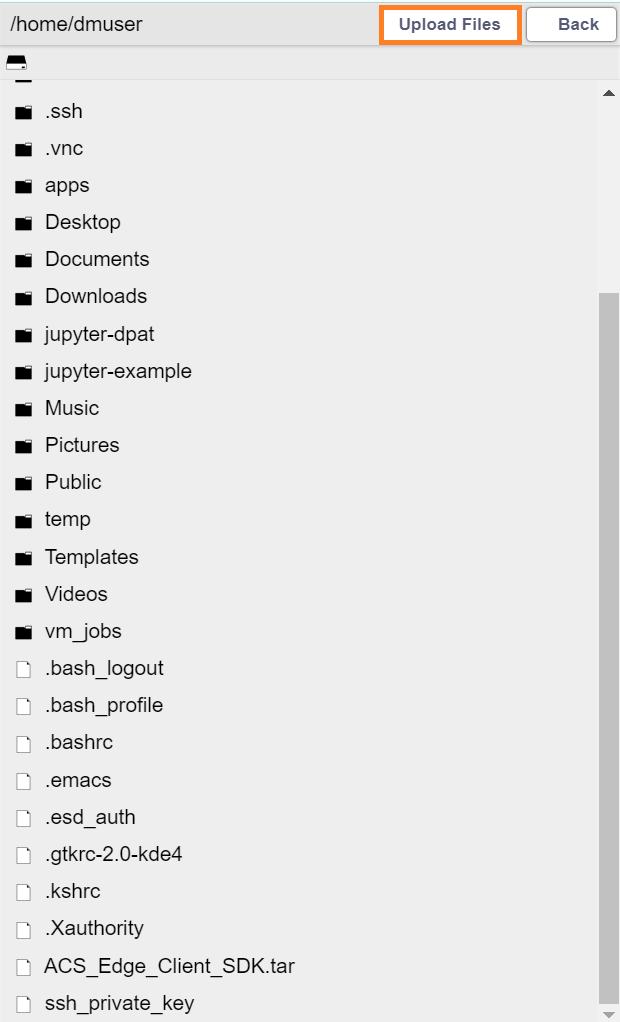
Uploading file#
Click “Devices” to enter into your home directory
Click “Upload Files” at the top right of the management sidebar
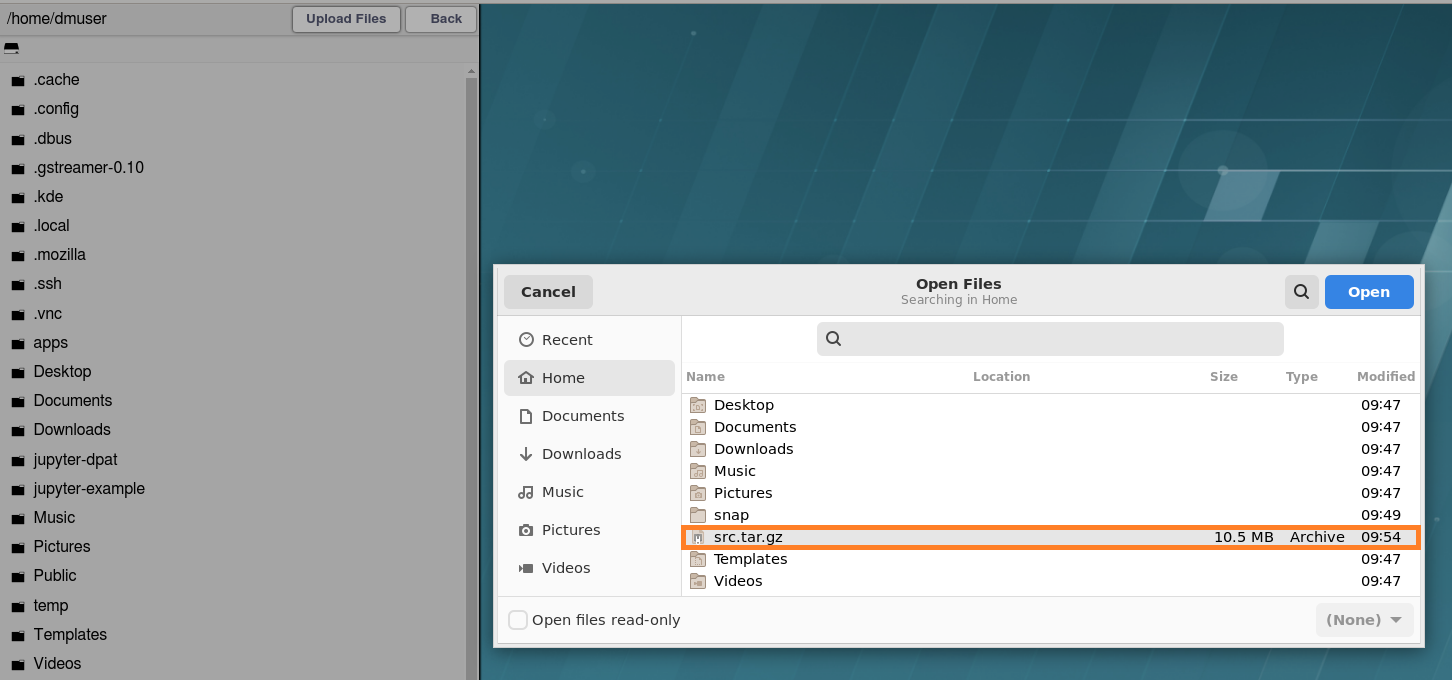
Select the file “src.tar.gz” in the dialog then click the “Open” button
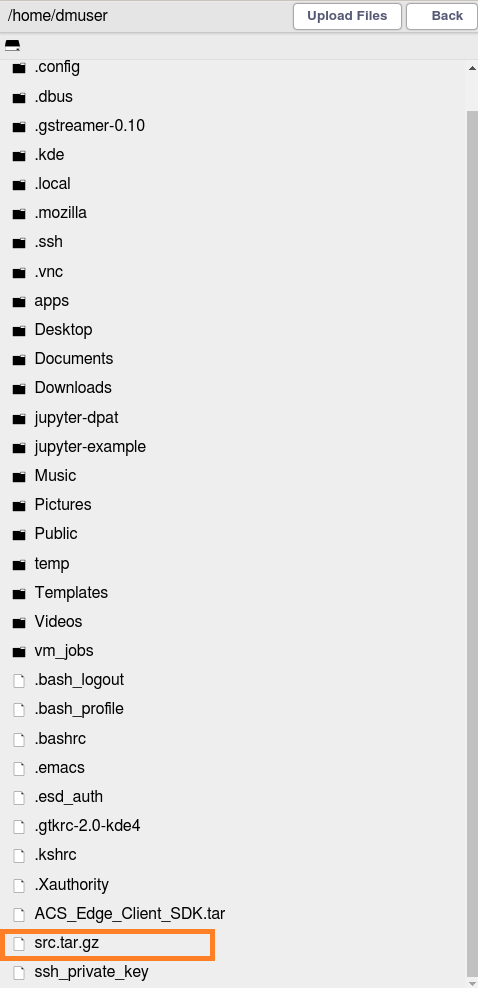
The file will be uploaded, you can confirm it in the file list
Sharing VNC and SSH with other users#
Open VNC or SSH, press Ctrl+Alt+Shift to open the management sidebar
Click the “Share” at the top of the management sidebar, then click the “VNC_share”
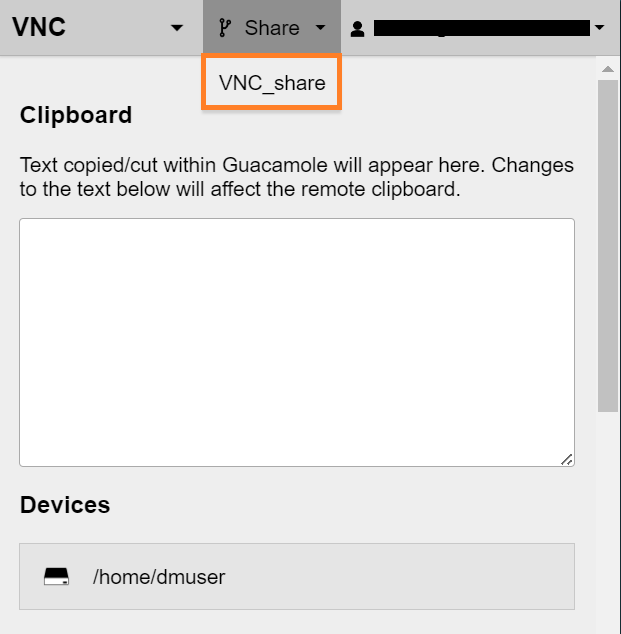
Copy the link and send it to other users to share VNC

Share VNC and SSH via email#
Open VNC or SSH, then press Ctrl+Alt+Shift to open the management sidebar
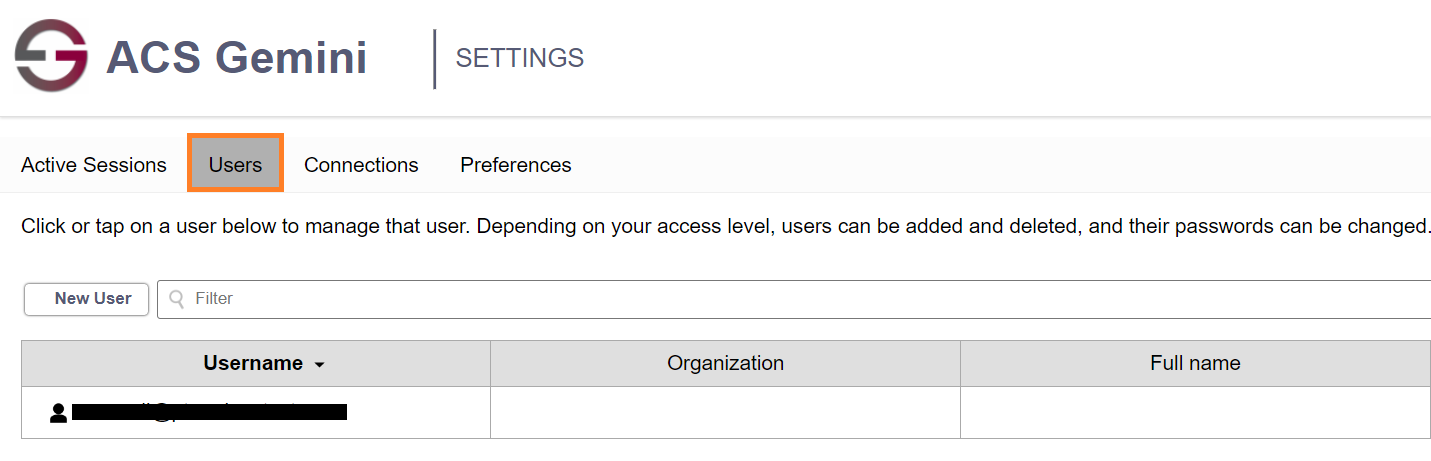
Click the “Settings” after clicking on the email address at the top right of the management sidebar
In “Users” tab panel, Click the “New User” button
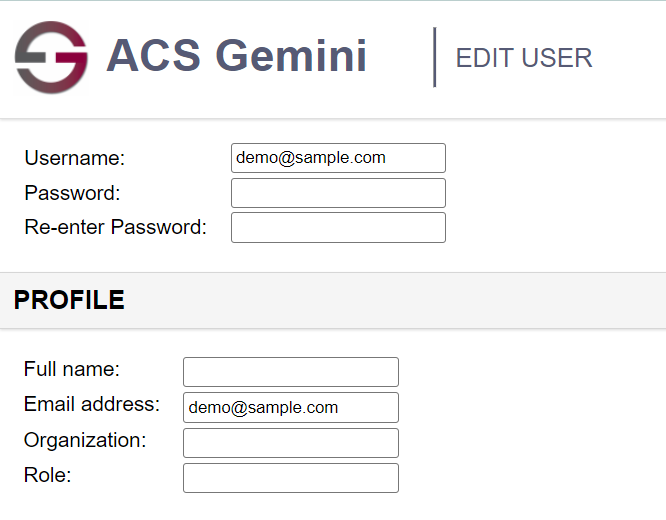
Enter the user’s email in “Username” and “Email address” fields
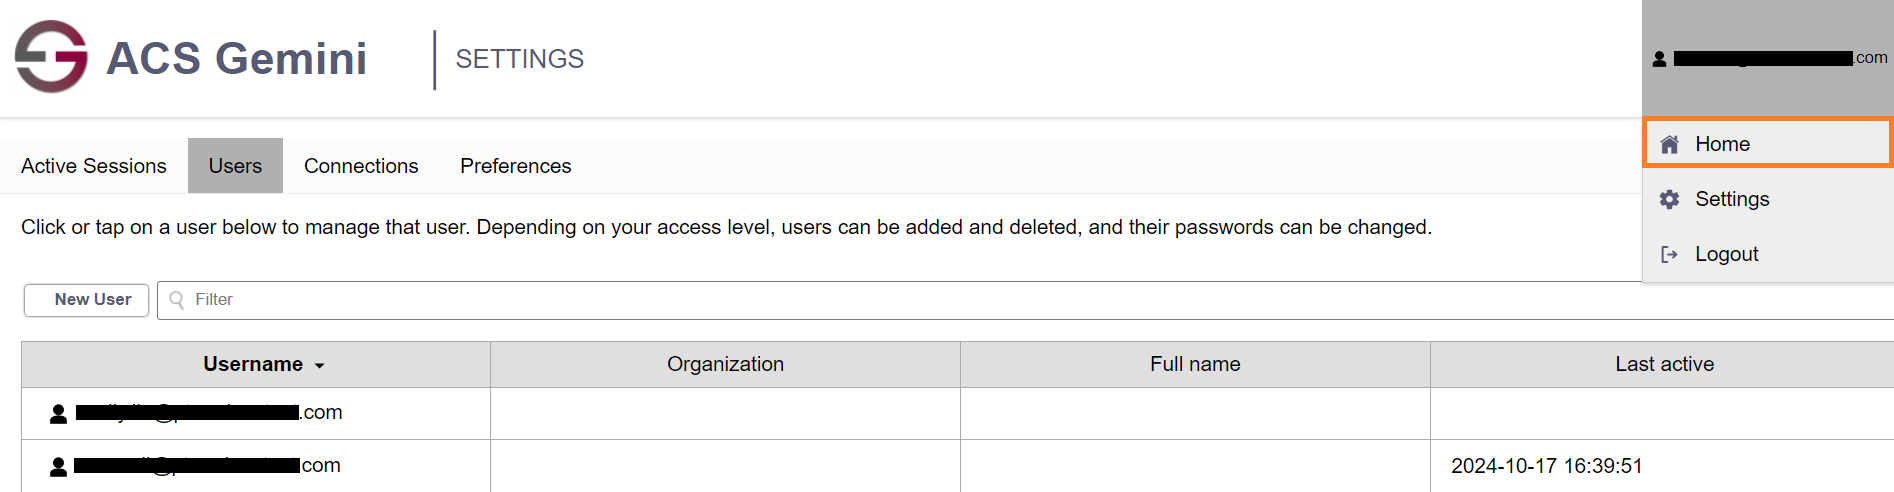
Scroll web page to the bottom, select “ALL Connections” tab panel, select the connection to be shared with, then click the “Save” button

Click the your email account at the top right of the page, then click the “Home”
Copy the URL and send it to the user which you want to share with